
7 Hidden Tools in Your G Suite Dashboard

G Suite Features Businesses Absolutely Love
Google’s G Suite is a collection of communication and collaboration software with the potential to take your company to the next level.
It’s the only solution you’ll ever need to improve how everyone in your organization interacts and collaborates on essential tasks and projects.
- Catch Suspicious Activity
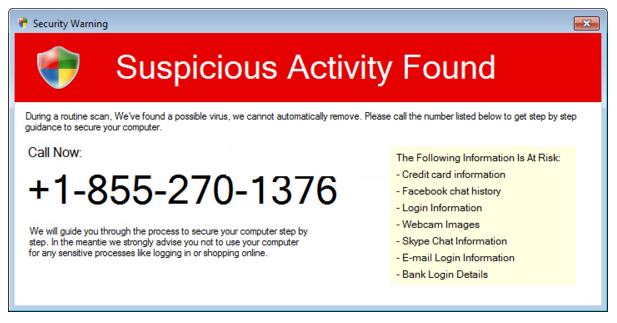
If you are ever concerned that someone else is accessing your G Suite account or the accounts of your users, you can examine the history of logins using the Dashboard, which may go back as far as six months in some situations.
The G Suite Dashboard is another aspect of the G Suite universe that you may find useful on a daily basis. It enables users to locate, track, and launch services and apps within G Suite.
However, it is capable of much more, particularly for administrators. Dashboard has a variety of components that administrators may utilize to generate specialized reports and make custom adjustments to your users’ G Suite environments. Some of Dashboard’s features may not be immediately apparent.
We’ve compiled a list of seven G Suite Dashboard hidden secrets to help you get the most out of this tool.
- Check How to Secure G Suite
The purpose of a new organization utilizing G Suite is to increase cooperation. And, as your business expands, G Suite can expand with it, allowing everyone in your organization to collaborate.
However, one disadvantage of rapidly expanding is that you end up with new users who may not be as familiar with your organization’s security policies as they should be, and they create duplicate emails and documents. The quantity of documents and communications in G Suite grows rapidly as you add one or two employees.
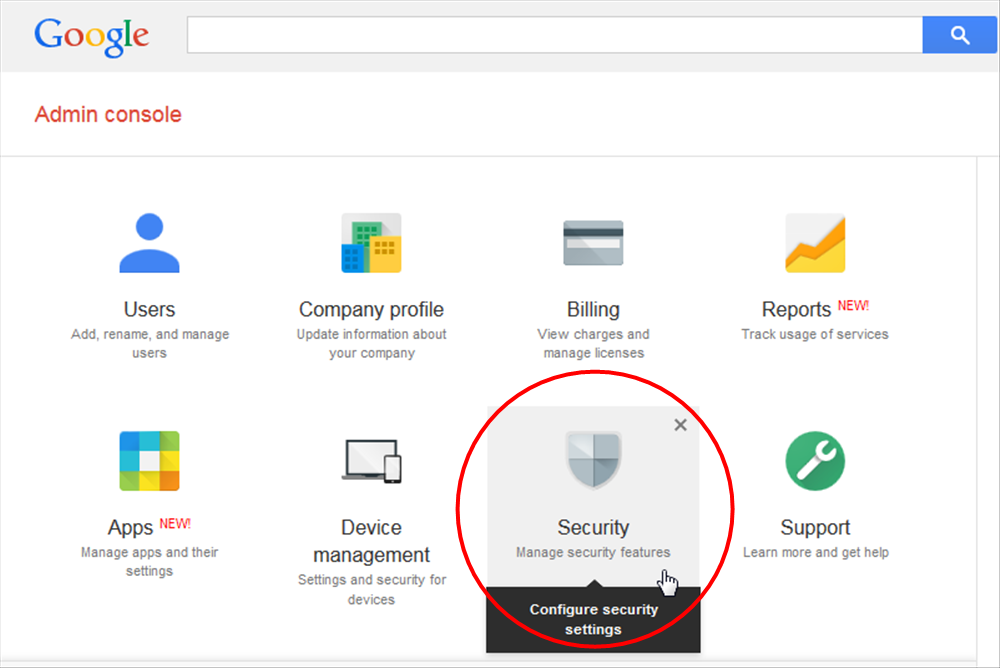
With all of this expansion comes an increased risk of a security breach somewhere along the route. You may use the Dashboard to track all types of threats to the general G Suite environment, as well as monitor any security compromises you may have in your environment, to ensure the safety of your G Suite business.
Select the data for the reports you want to generate related to security. You can track different items, depending on which version of G Suite you’re using. Some of the items you can track with G Suite Essentials include:
- Whether any account had an odd number of incorrect login attempts
- Number of suspicious login user attempts
- Number of failed login user attempts
- Exposure risk of different files
G Suite Enterprise users may track the same elements as Essentials users, as well as a few others, such as:
- Number of authenticated messages
- Number of encrypted messages
- Number of inbound messages in total
- Number of inbound messages routed through the spam filter (further split by malware and phishing attempts)
- Number of inbound messages with suspicious attachments
- Number of inbound messages with spoofing attempts
You may also specify a time period for your different reports that span up to six months in the past, allowing you to analyze whether the number of security vulnerabilities is rising.
- Customize the Dashboard View for Your Users
As the administrator, you may choose how people in your business can access the Dashboard using their personal accounts.
Users may use Dashboard to view all of the applications that you have installed for them and granted them access to. They may access these applications via Dashboard. The Dashboard also has a Search box at the top, allowing them to hunt for a certain program if they don’t see the icon.
As the administrator, you have control over many of the things that users may do and view on their Dashboard.
Create a Support Message
When you’re logged in as an administrator, you may send your users a personalized message on how they might request access to an app. This message will appear on the Dashboard every time the user opens the Dashboard panel.
Click the Add Admin Message text in the upper right corner of the window from your Dashboard. Then, from the Admin panel, go to Account Settings, then Profile, and finally Support Message. (If you don’t see these options, you don’t have the necessary permissions.)
Enter the message you want people to see in their Dashboard window and save it. If desired, you can include links within the message. You may also include additional lines inside the message.
Add a Core Service for a Group
Create a group of users if you just want a subset of your organization’s users to have access to one of G Suite’s services.
You may provide members of groups access to certain G Suite core services, such as:
- Calendar
- Chat
- Drive
- Meet
- Tasks
You also can turn on additional Google services for certain groups, including:
- Google Analytics
- Google Maps
- Google Payments
- Google Photos
- Google Play
- Google Voice
- YouTube
- Hiding Your Viewing History
If your business uses Google Docs to share documents with multiple employees, enabling everyone to make editing changes or contribute comments, you’re already aware that everyone can see the modifications you’ve made.
People may also see who accessed the paper and when. However, you may choose to conceal your viewing history from others so that they do not know when you last saw the document. This option is available via the Dashboard.
In the past couple of years, Google added a shortcut for the Dashboard within a few key apps, including:
- Docs
- Drawings
- Sheets
- Slides
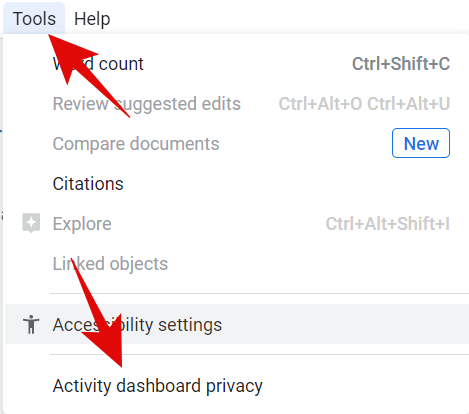
The shortcut button resembles an upward-pointing angled arrow. It’s located in the upper right corner, just to the left of the Share button. Click this button while your document is open to launch the Dashboard pane. Look for Privacy Settings in the lower left corner and click on it.
You may adjust your Account Setting slider bar in the center of the window. You may choose whether or not to display your view history for Docs, Sheets, and Slides files that others have shared with you in this area. If you disable this option, G Suite will disable your view history for all documents.
If you simply want to disable view history for the current document, utilize the Document Setting slider bar in the lower half of the window.
Others will be unable to see your last view date on the Viewers page if either of these options is disabled.
- Learn How Your Organization Uses Meeting Rooms
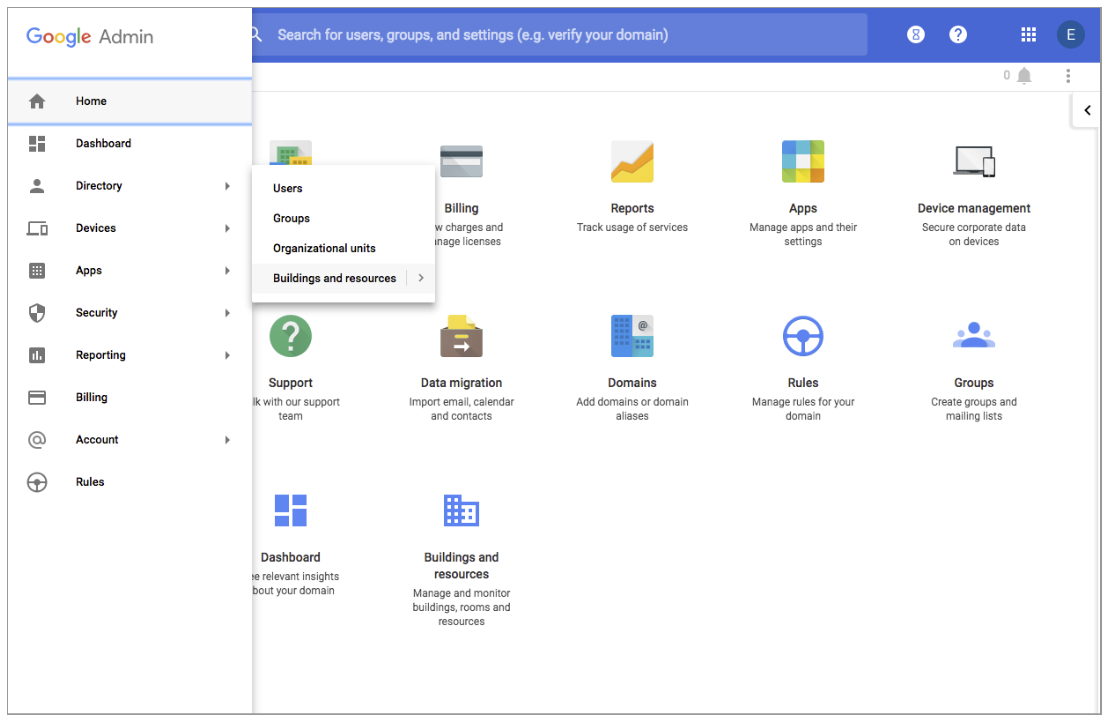
Using data from Google Calendar, administrators can observe how the business is using real rooms for meetings in your facility via the Room Insights Dashboard in G Suite. (To use this function, users must be able to schedule meetings using Calendar and pick specific rooms in the building for their meetings.)
Sign in as an administrator to see Room Insights. Select Buildings and Resources, then Open Room Insights. Filter the information on the Room Insights Dashboard for things like certain rooms in the building and specific days of the week.
You will be able to determine things like:
- Which meeting rooms are the most popular
- Whether your teams are not using certain rooms enough
- Whether your teams are using certain rooms at a higher-than-average rate (and then drill down as to why that room is popular)
- What sizes of rooms are most frequently in use
- Whether certain types of equipment in a room make it more popular
- What times of day certain rooms typically are not in use, allowing for maintenance
You will be able to modify the meeting rooms in the building to best match the needs of your business using this data, allowing you to utilize your physical real estate more efficiently.
- Troubleshooting G Suite Problems

It might be a difficult scenario if you are unable to acquire access to portions of G Suite in the cloud. Even while G Suite and Google’s services are highly stable, there may be instances when some components of G Suite fail, preventing you from completing certain activities and likely prompting your users to bombard you with queries about what is going on.
You may check the status of many Google elements directly with Google via the G Suite Status Dashboard. This helps you to determine if the issue is on Google’s end or on your organization’s end.
To see the Status Dashboard, go to https://google.com/appsstatus. All of your applications and services will be shown on the left side of the screen, along with a colored dot indicating their status. (Green is a good color.)
You’ll see columns in the center of the page that indicate different days, allowing you to look back and check whether there was an issue or outage earlier in the week. To see the precise issue that Google is reporting, click on any orange or red dot in a column.
Continue to check the Status Dashboard if you are experiencing a problem. As the Google team works to resolve the issue, the Status Dashboard will be updated to let you know when you may resume work.
- View Results of Email Sorting
The Gmail app in G Suite will sort emails sent to your domain by others. Although Gmail performs an excellent job of routing emails most of the time, your domain’s custom Gmail settings may overrule how the Gmail app sorts a particular message.
You may utilize the Dashboard inside G Suite to view data on how your domain’s custom settings influence how Gmail sorts your messages, such as ensuring that messages that should be delivered are not classified as spam.
Sign in as an administrator to view the report. Click Security, then Dashboard. Click on Custom Settings, followed by View Report.
You’ll see a couple of items in this report, including:
- Number of messages that the domain’s custom Gmail settings are affecting
- Number of messages that the Gmail app would sort differently from your domain’s custom settings
You may then apply additional filters to the data in the report to dig down for more information, such as:
- Only include externally created messages
- Only include internally created messages
- Only include messages the app sent to quarantine
- Only include messages the app fully rejected
- Only include messages from sources considered legitimate (whitelisted)
- Only include messages considered clean that Gmail delivered as intended
- Only include messages Gmail sent to the spam folder
You can choose a date range for the data collected in the report. The default is one month of data, but you can select to include up to six months. (However, some sorts of data are only available for one month.)