
How to Install WordPress Manually

Complete Guide to Install WordPress
WordPress is the most widely used web platform and Content Management System (CMS). By using it to build your site, you’ll be joining a vibrant community of users and developers. However, if you’ve never installed it before, you might be confused about the process and how to get everything to work.
Fortunately, all you need is a well-thought-out strategy and a little patience. Manual installation will almost certainly take longer than one-click installation. However, by the end, you’ll have a better understanding of what makes the platform so incredible, as well as valuable knowledge to use in the future.
Manually installing WordPress isn’t difficult, but it can be challenging if you encounter an unfamiliar aspect of the platform. We’ll go over why and how to do this type of installation in a moment, but we’d be remiss if we didn’t first tell you how to avoid it entirely.
Instead of installing WordPress on your own, you can often have your hosting service do it for you. If that service is WordPress-optimized, you may be offered features that significantly simplify the process.
Check out our WordPress Hosting
Step to Install WordPress
Step 1. Create the MySQL Database and User
You’ll need access to your hosting account’s cPanel for this. WordPress usually saves all of the data in a database.
A database can be regarded as a repository for all of the information that a visitor sees on your site. It holds text files, WordPress themes, and plugins, among other things.
To save the data, you’ll need to construct a database, which you can do by following the steps below.
- Log in to your cPanel.
2. There is usually a MySQL Database Wizard under the Database section. Click on it. Kindly note down the below details in a separate text file as it will be used in further steps.
3. Create a Database and enter the database name. Click Next Step.
4. Create Database Users and enter the username and password. Click Create User.
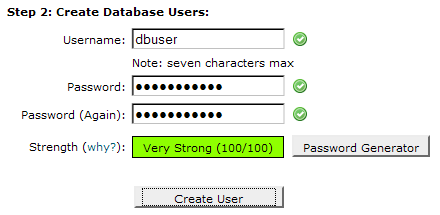
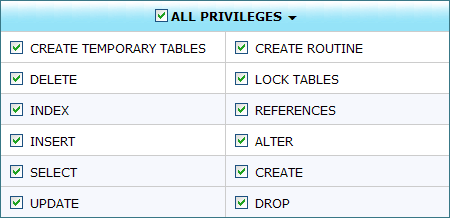
5. Incorporate the user into the database. You will then be sent to the privileges option. Choose the ones that best suit your needs. Select all privileges if you’re creating an admin account. If you’re creating a user account for an employee, you can limit his access by giving him less privileges.
Note down the details mentioned above including the database name, username, and password in a separate text file and save it in a secure folder.
Step 2. Configure wp-config.php
The database information is stored in the wp-config-sample.php file, which instructs the WordPress program which database to pull data from. This step must be completed to verify that the WordPress installation is linked to the correct database information.
The wp-config-sample.php file can be located in the WordPress installation folder’s File Manager. Because the default folder for your primary domain is public Html, the instructions below will walk you through the process for that folder.
- Log in to cPanel.
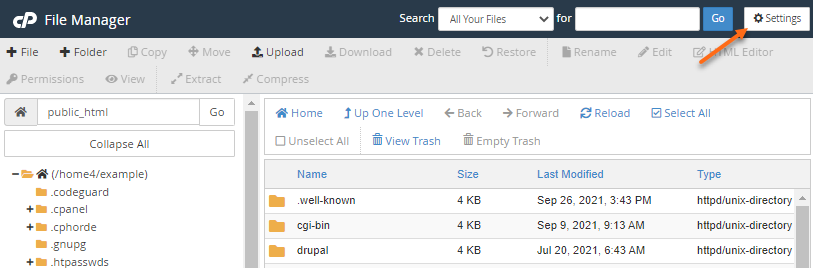
- Navigate to the Files section, then click the File Manager icon.
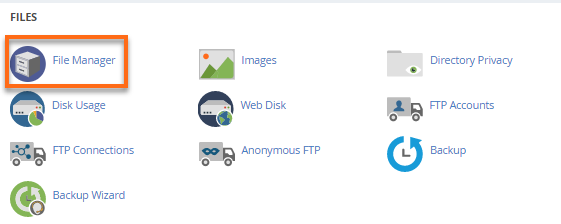
3. From the left-hand navigation menu in File Manager, click public_html. Click on the Settings button found on the top right-hand corner of your File Manager.
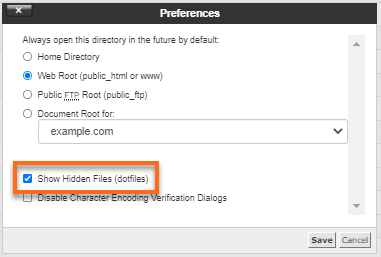
4. In the pop-up box, check the box for Show Hidden Files (dotfiles), then click Save.
5. In the right-hand panel of the File Manager, locate the wp-config-sample.php file.
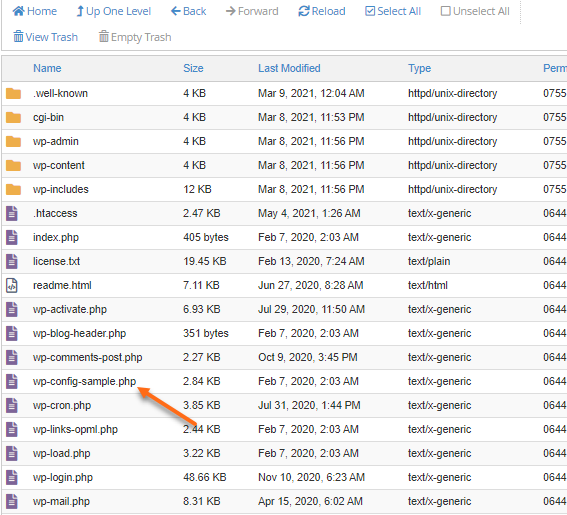
6. Right-click on the file, select Rename.
Change the name of the file to wp-config.php, then click the Rename File button to save the change.
Right-click again on the new wp-config.php file and select Edit.
A second pop-up box will appear. Click the Edit button.
When the file opens, look for the following information:
define(‘DB_NAME’, ‘database_name_here’);
/** MySQL database username */
define(‘DB_USER’, ‘username_here’);
/** MySQL database password */
define(‘DB_PASSWORD’, ‘password_here’);
Replace database_name_here with the name of the database you created (above in Step 3: Create MySQL Database and User ⤴).
Replace username_here with the username of the database you created.
Replace password_here with the password of the database that you created.
Note: Make sure there are no spaces before or after your database name, username, and password.
Once done, click the Save Changes button on the top right, then Close to exit and return to the File Manager.
Step 3. Upload Your WordPress Files to Your Server
This is perhaps the simplest step to do. We’ve already spoken about where to look for your FTP credentials and how to access your server. You’ll want to search for the top-level directory (which could be called home, public Html, www, or root) once you’ve arrived.
While you could install WordPress in a subfolder (especially if you already have a website up and running), we’re going to use a clean server for this example. Simply navigate to your local WordPress folder in FileZilla’s left-hand panel, copy all of the files contained therein, and drag them to your root folder:
After you’ve submitted your files and created your database, the final step is to install and configure WordPress.
Step 4. Run WordPress’ Installation Script
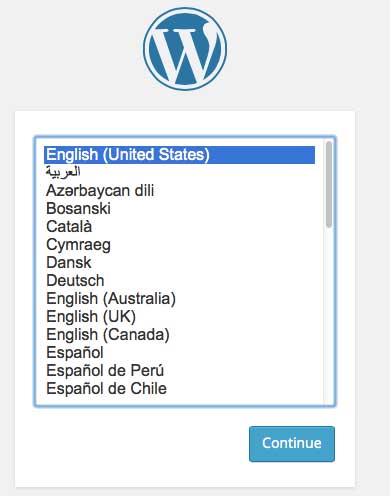
After you’ve done the preceding stages, it’s time to run the script that will finish your WordPress installation. To get started, go to yourdomain.com/wp-admin/install.php and replace the placeholder domain with your site’s domain. Before clicking, you should get a prompt asking you to select a language for your WordPress installation, which you should do. Continue:
The next screen enables you to name your site, and add a WordPress admin username, password, and email address. When creating your username, it’s important to make sure it’s secure. If nothing else, choose a different name than simply admin — and also generate a complex password.
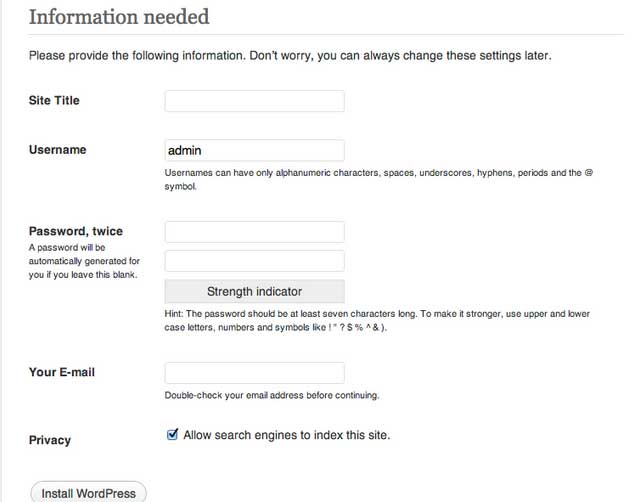
Finally, uncheck the Allow search engines to index this site box. This stops your site from appearing in search engines until you’re ready to go live, although you can change this setting later within WordPress. When you’re finished, click Install WordPress.
Step 5. Finalize and Test Your Installation
You’ll be sent to the WordPress dashboard once WordPress is installed. If not, walk through some of the most typical installation issues and contact your host if you have any problems.
You’re probably wondering what to do next at this point. Here’s what we suggest:
- Select an appropriate theme. In a nutshell, this determines how your site appears on the ‘front end.’
- Install a few necessary plugins. These are plugins that extend the capabilities of WordPress, and some of them are essential for keeping your site and users safe.
- Get started writing. You’ll now want to build any necessary pages and posts — this is the exciting part!
- Our recommendation is to immerse oneself in WordPress by reading as much content as possible about the platform. Our site is a good place to start, but there is a plethora of information on WordPress and how it works available online.
Conclusion
When it comes to creating a successful site, knowing how to manually install WordPress gives you an advantage. You can view how your website communicates with the database, as well as how your files and permissions function. You can also learn to solve problems at their source while developing a skill set that will allow you to successfully construct future websites.
More information:
For more information about Google G Suite/Workspace domains, Server, Hosting, check out these F60 Host resources: