
How to Install WordPress in Control Web Panel (CWP)
What is WordPress?
WordPress is a popular free and open-source content management system (CMS) known for its versatility and ease of use. There are several methods for installing WordPress, from using an installer offered by a website hosting service to manually.
We’ll go over how to install WordPress in Control Web Panel (CWP), formerly known as CentOS Web Panel, in the sections below.
Check Out: 3 Best Review Plugins: Elevate Your WordPress Website
How to install WordPress
The simplicity with which WordPress may be installed is well-known. Installing WordPress is usually a quick and painless procedure that takes less than five minutes. Many web providers now include solutions (such as Fantastico) that automatically install WordPress for you. However, if you want to install WordPress independently, the following instructions will assist you.
Step to Install WordPress in Control Web Panel
Step 1: Log into Control Web Panel.
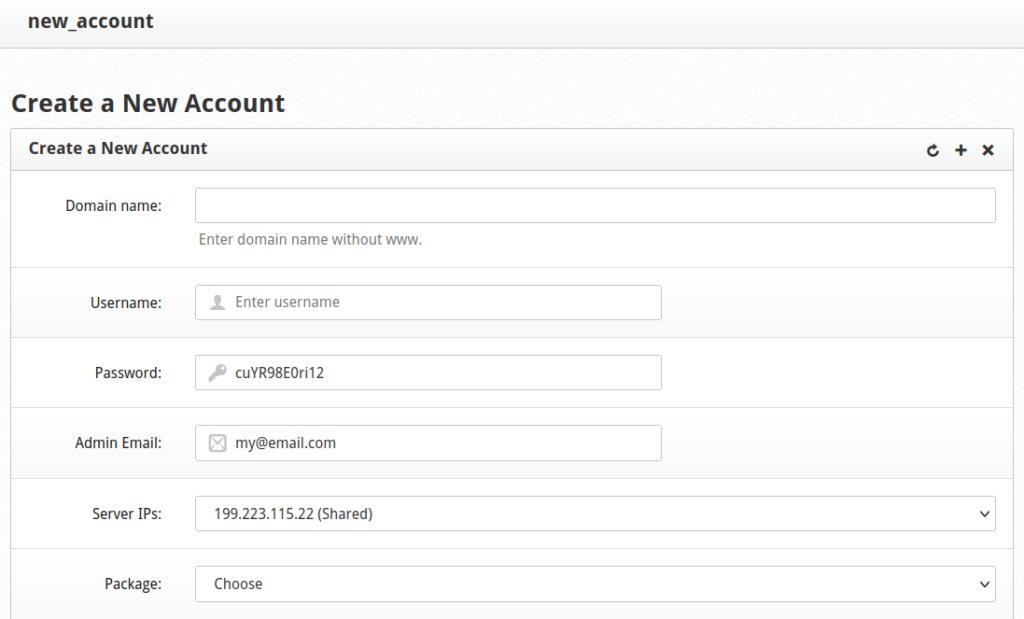
Step 2: On the left select “New Account.”
Step 3: Add the WordPress domain name and a CWP username, password, and email address.
Step 4: Choose the “default” package if you’ve not created others.
Step 5: Select “Create” at the bottom. This will also create a MySQL user for the account linked with the user’s password.
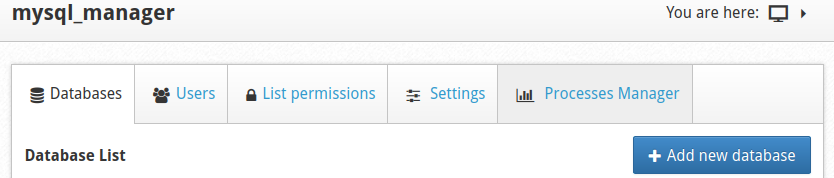
Step 6: On the left, select “MySQL Manager.”
Step 7: At the top, select “Add new database.”
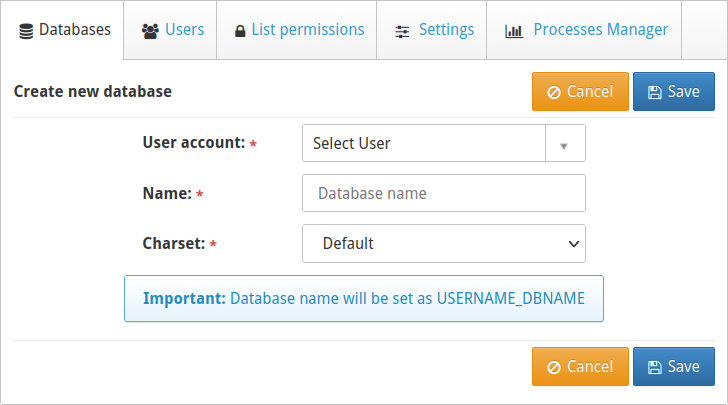
Step 8: Select the new CWP user account, specify a database name, and select “Save.”
Step 9: At the top, select “Terminal” and “Simple Terminal” to open a new window.
Step 10: Navigate to the new user’s public root directory, replacing “USER” with the CWP username:
cd /home/USER/
Step 11: Download the latest version of WordPress:
wget https://wordpress.org/latest.tar.gz
Step 12: Extract the tar file:
tar -xvzf latest.tar.gz
Step 13: Remove the default CWP index file:
rm index.html
Step 14: Move all the files from the new “/wordpress” directory to the current directory:
mv wordpress/* ./
Step 15: Remove the now empty “/wordpress” directory and tar file:
rm -rf wordpress latest.tar.gz
Step 16: Change the owner of the website files from root to the CWP user, replacing “USER” with the CWP username:
chown -R USER:USER *
Configure WordPress
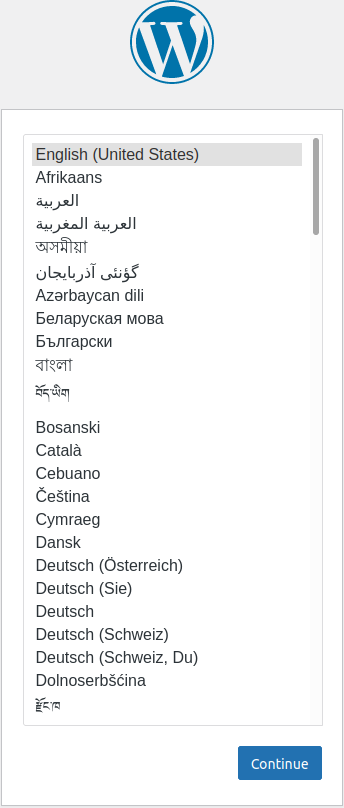
Step 1: Visit your WordPress domain in a web browser. You’ll be redirected to the setup wizard.
Step 2: Select your primary language and continue.
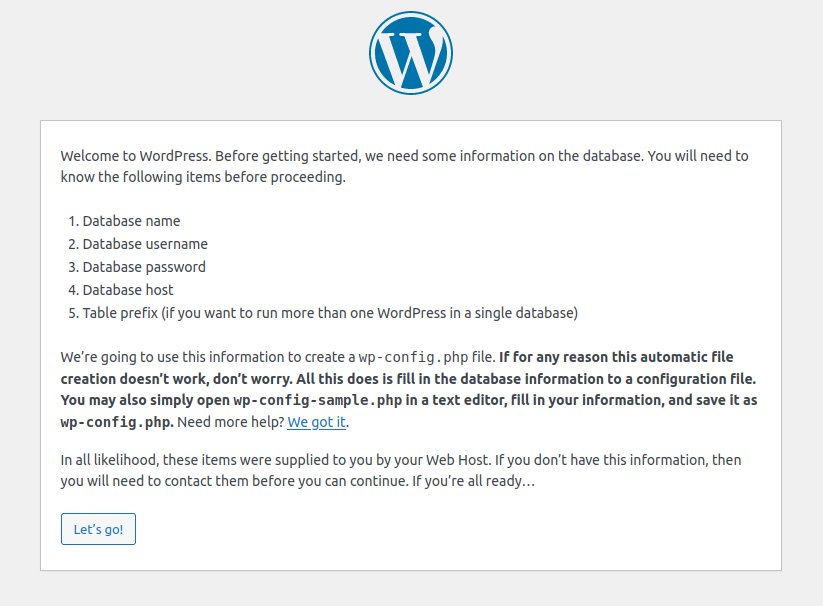
Step 3: The following page explains what information you’ll need from the database you built before. Choose “Let’s go!”
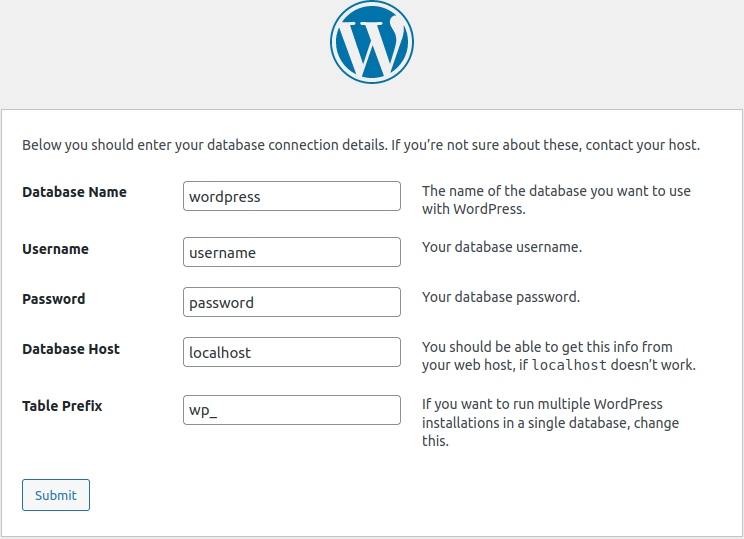
Step 4: Add the database name, owner/user, and CWP user password. Select “Submit“
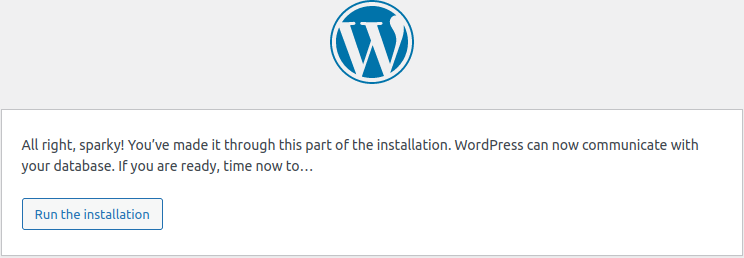
Step 5: A short, successful message will appear if there are no issues. Start the installation process.
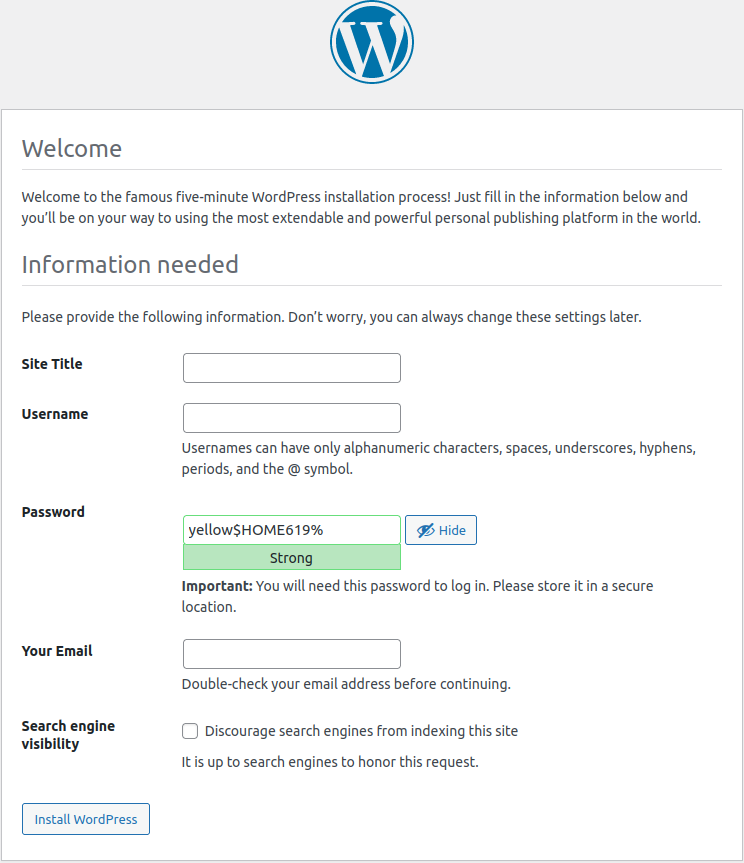
Step 6: Add a title for your WordPress site, as well as an admin username, password, and email address. You should install a maintenance mode plugin later to prevent unwanted access better and dissuade search engines from crawling this site. Install WordPress on your computer.
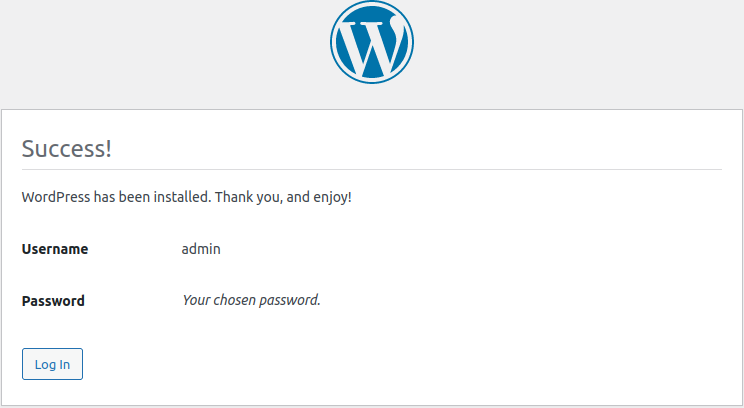
Step 7: Your admin user will be displayed on the success page. Log in to your WordPress account.
Conclusion
This tutorial has showcased how to install WordPress in Control Web Panel (CWP), Configure WordPress.
Why Should I Choose WordPress?
WordPress is simple to use, even for beginners. Because of its extensive library of plugins and themes, it is highly customizable, scalable, and search engine friendly. Furthermore, because it is an open-source platform, it is free to use, share, and modify for various purposes.
More Information:
For more information about Google G Suite/Workspace domains, Server, and Hosting, check out these F60 Host resources: