
How To Update WordPress Plugins?

A Guide to Updating WordPress Plugins
WordPress Plugins are bits of software that can be uploaded to extend and expand the functionality of your WordPress site.
WordPress is a fantastic CMS that is gaining popularity. It is, however, not without flaws. We all have different needs, and WordPress cannot meet them all out of the box. That is why plugins are available. It is extremely important for security reasons that you keep the plugins updated. We will show you how to properly update WordPress plugins and how to manage plugin updates more efficiently in this step-by-step guide.
So Why would WordPress Plugins Be Updated?
WordPress plugins function similarly to apps for your WordPress site. Install them to add new features and functionality to your website, such as contact forms, photo galleries, sliders, and so on.
Third-party developers create plugins. The majority of them continue to improve their plugins by adding new features, improving code quality, and making them more secure. These modifications are then made available as updates.
You should always keep your WordPress plugins up to date to ensure that any changes you make are immediately reflected on your site. This improves the security and performance of your WordPress website.
Having said that, let’s see how to update WordPress plugins.
To Update WordPress Plugins Automatically
If your WordPress version is up to date (which it should be), you can enable automatic plugin updates directly from the site dashboard. To get started, go to Plugins – Installed Plugins (1).
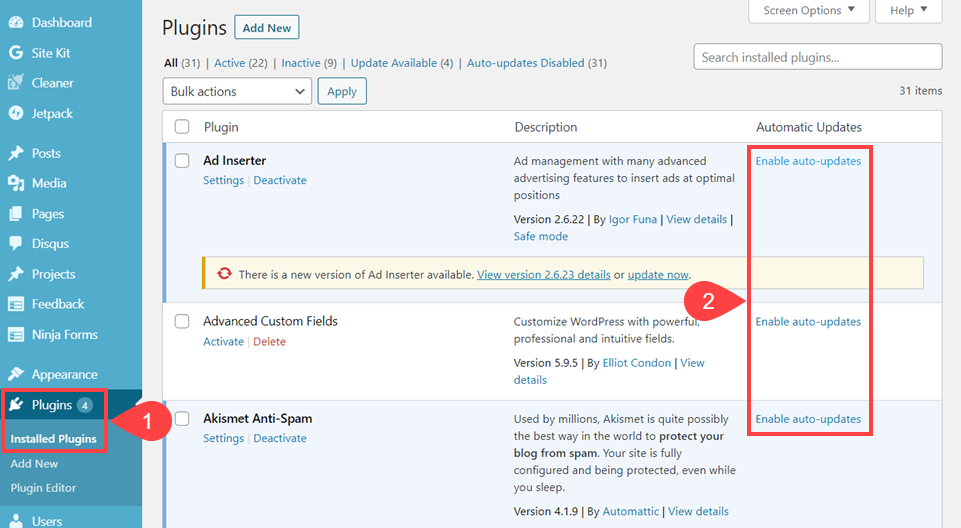
Each plugin in the list has its own Enable Auto-Updates (2) option to the right of its entry. You only need to click that button to leave anything in WordPress’ capable hands.
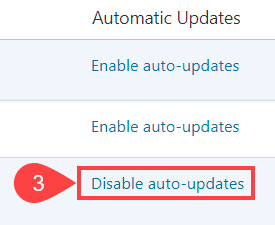
The link will then simply change to Disable Auto-Updates in an unsavoury manner (3). You can switch back and forth as frequently as you want or need.
To Update Using WordPress Management Services
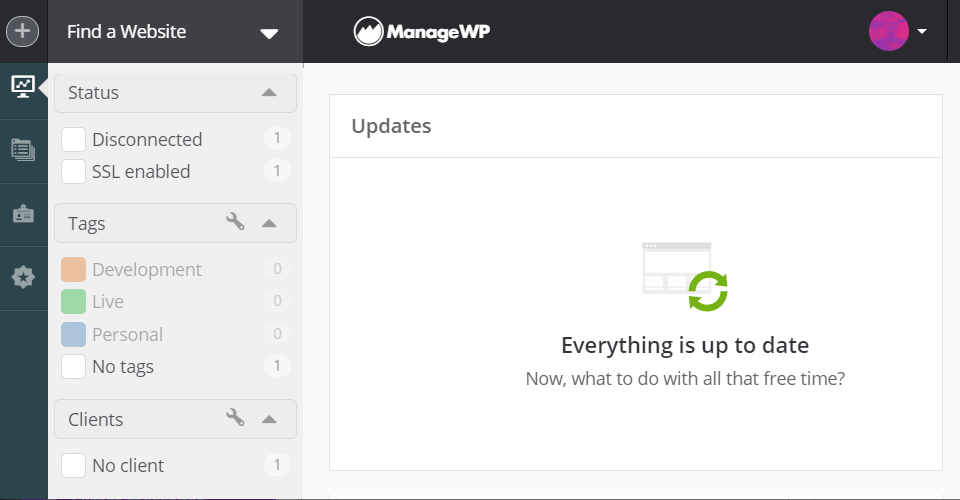
WordPress management services, such as ManageWP, can also handle plugin updates for your WordPress site. Services like this allow you to consolidate multiple sites that you manage into a single dashboard for easy access to everything. Updates to themes and plugins, in particular.
You have to click on the Websites (1) tab in the left-hand sidebar and click Add Another Website (2), to add sites to the dashboard and manage updates.
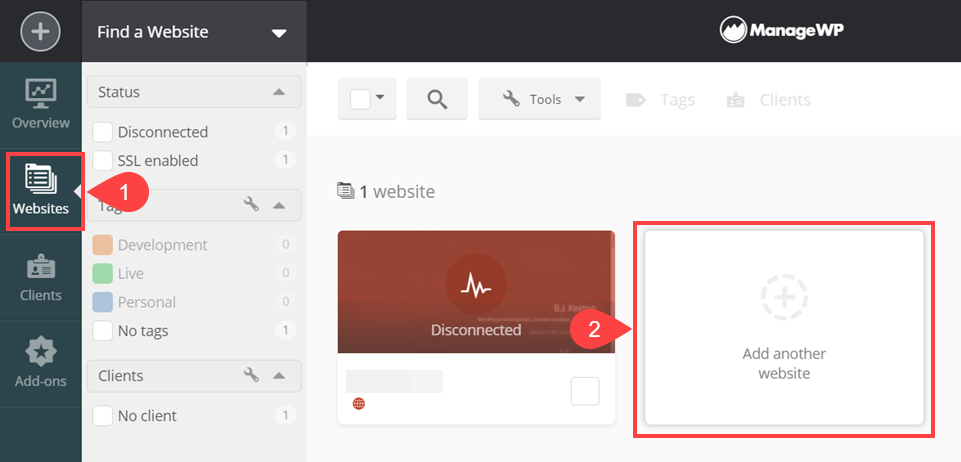
You will be asked to enter your WordPress admin credentials or to use the ManageWP Worker plugin. Either way, your website will be synced to the service dashboard. This will immediately display plugins that have problems (4).
Image
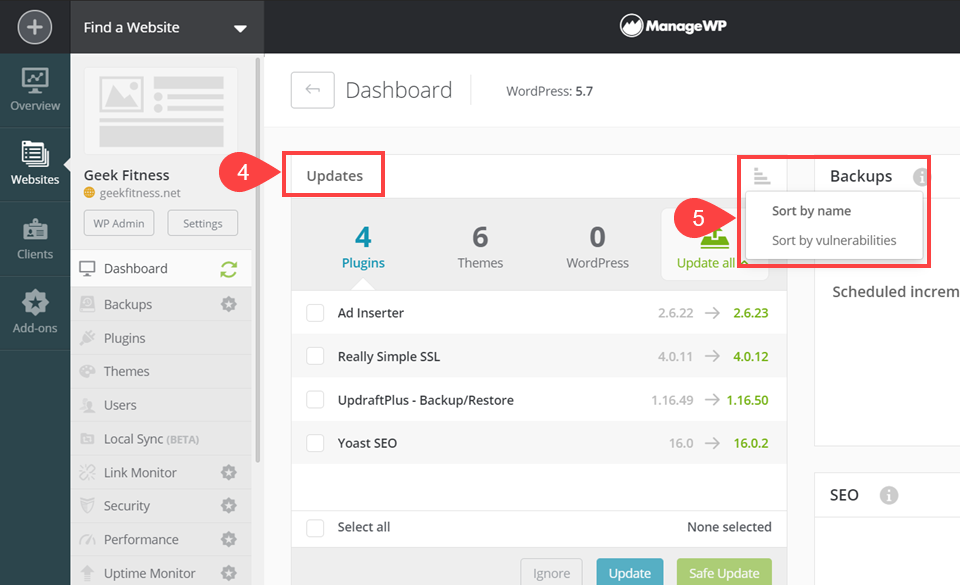
Any plugins that have received updates will be displayed here, and you can sort them by name or priority of security vulnerabilities (5). Furthermore, if you click the Plugins (6) tab near the left, you will be able to manage the plugins for the entire site, just like in your WP admin panel.
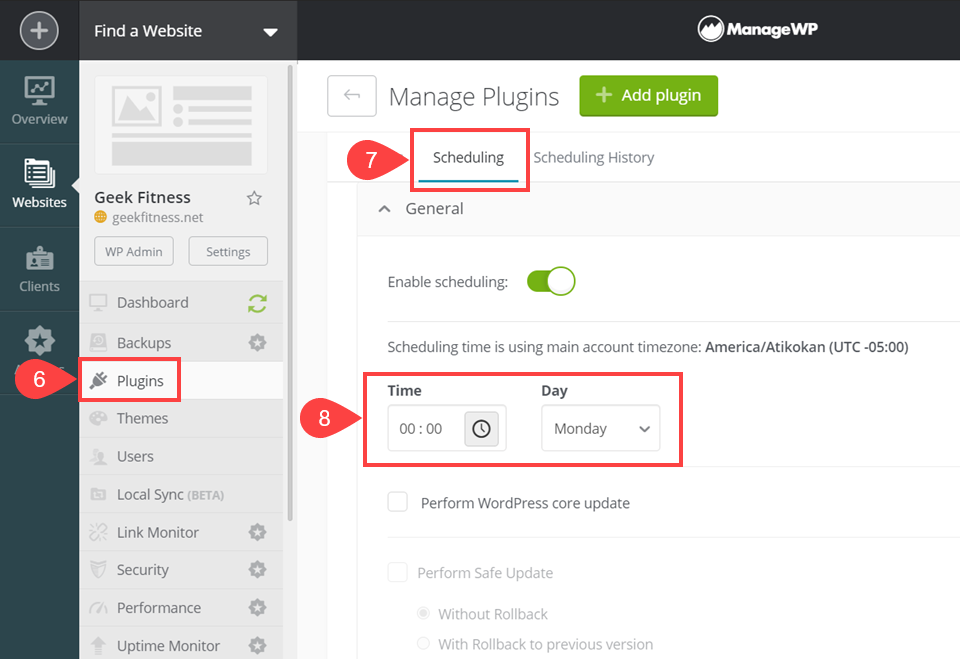
Only services like this one allow you to set up automatic updates (8). That way, you’ll know when maintenance will take place. And when there is a chance that the site will have problems (9).
Using a WordPress management service like this can save site administrators a lot of time and headache. You get features that aren’t built into the core of WordPress that can make your life a lot easier. ManageWP isn’t the only one available.
To Update Plugins Manually
To update WordPress, you should always use automatic or one-click methods. However, you can still manually update the CMS if you prefer or if you are unable to do so for some reason.
Be cautious: you are a human (I believe! ), so you can make mistakes and break your installation, so please follow the instructions step by step. Furthermore, keep in mind that backing up your installation is always a good idea.
- Install the most recent version of WordPress. You can use the button we showed you when we described how to update in one click, or you can download it from WordPress.org. You will be given an archive, which you must unpack.
- Deactivate all plugins you use to ensure that none of them cause a bug during the update. You can do this quickly by selecting ‘Deactivate‘ from the drop down list after selecting all of your plugins.
- Now you have to replace the right files. In your current installation, delete the wp-includes and wp-admin folders. Then upload the new ones.
- Upload the new wp-content folder’s content into the old one. You will update the old official themes and plugins by overwriting the existing files. Don’t worry, the other plugins and themes will continue to function normally, and your media files will be unaffected.
- Replace all of the files in the root directory with the new ones by uploading all of them. The only file you need to be concerned about is wp-config.php, which will not be overwritten because it does not exist in the new version: wp-wonfig.php is named wp-config-sample.php in the archives you download. You must now compare that file to your wp-config.php to ensure that no new lines have been added; if so, copy and paste the new lines from wp-config-sample.php to your old wp-config.php
- When an automatic update fails, .maintenance file is added to your installation. If you manually update to resolve the issue, you must delete this file.
- It’s possible that your database needs to be updated as well. Check your administration panel to see if this is the case; if it is, a message with a link will appear. When you click on it, your database will be updated.
- The update has been completed. All that remains is for you to reactivate the plugins that you use.
We hope this article helped you learn how to update WordPress plugins.