
How to Bulk Edit Featured Images in WordPress
When it comes to managing a WordPress website, efficiency is the key to success. The ability to make bulk edits can save you valuable time and effort. One area where bulk editing can be particularly useful is images. In this blog post, we’ll explore how to bulk edit featured images in WordPress, allowing you to streamline your workflow and enhance your website’s visual appeal.
Benefits of Bulk Editing Featured Images:
- Time Efficiency: Manually editing featured images for each post or page can be a time-consuming task, especially if you have a large website or frequently update your content. Bulk editing enables you to make changes to multiple featured images simultaneously, significantly reducing the time required for image management.
- Consistency in Design: Maintaining a consistent design throughout your website is crucial for branding and user experience. Bulk editing featured images allow you to easily update the design elements across multiple posts or pages, ensuring a cohesive and professional appearance.
- Flexibility and Experimentation: With bulk editing, you can quickly experiment with different featured images across various posts or pages. This flexibility allows you to test different visuals, see how they resonate with your audience, and make data-driven decisions on which images work best for your content.
- Streamlined Content Updates: Imagine having to individually edit featured images every time you want to update your content or implement design changes. Bulk editing simplifies this process by enabling you to make global modifications to featured images, ensuring that your updates are reflected consistently across multiple posts or pages.
- Improved SEO: Featured images play a crucial role in search engine optimization (SEO). They help make your content visually appealing and attract users’ attention in search engine results and social media platforms. By bulk editing featured images, you can optimize them for SEO by adding relevant alt text, and descriptive filenames, and resizing them for faster page loading times.
Edit Featured Images in WordPress (Plugin Method)
Install a Bulk Editing Plugin: To begin, let’s find a suitable plugin that offers bulk editing capabilities for featured images. A popular option is the “Bulk Featured Image” plugin, which provides a user-friendly interface and a range of useful features. Install and activate the plugin to unlock its powerful functionalities.
Navigate to the Bulk Featured Image Interface: Once the plugin is activated, you’ll find a new menu item in your WordPress dashboard labelled “Bulk Featured Image.” Clicking on this will take you to the plugin’s interface, where you can start editing images in bulk.
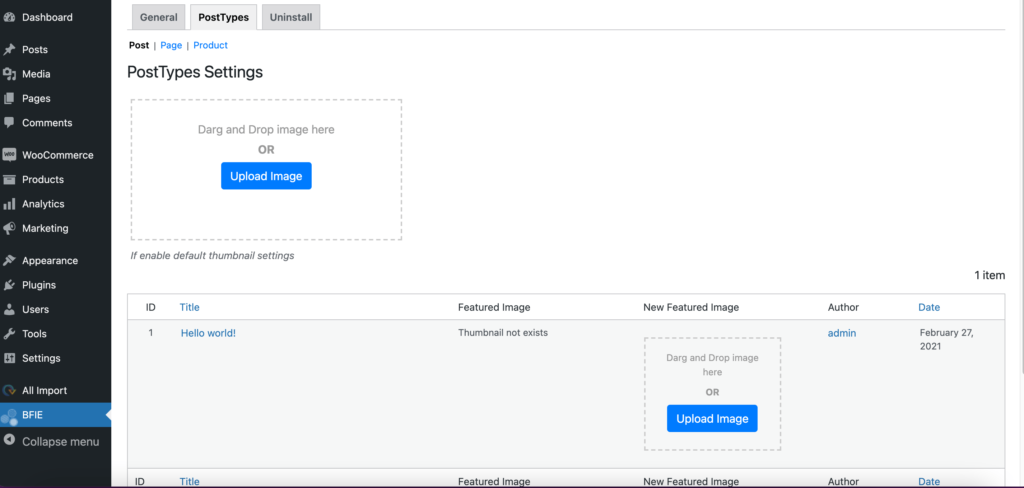
Select the Desired Images: In the Bulk Featured Image interface, you’ll see a list of your website’s posts or pages. Choose the specific posts or pages you want to modify by selecting the checkboxes next to them. If you want to edit all the posts or pages, simply click the checkbox at the top to select all.
Bulk Editing Options: Now that you have your desired posts or pages selected, it’s time to explore the bulk editing options provided by the plugin. You can perform various actions on the images, such as replacing them with new images, removing images altogether, or setting a default featured image for selected posts or pages.
Replace Featured Images: To replace images in bulk, select the “Replace” option from the available actions. You can either upload new images or choose from existing ones in your media library. The plugin will automatically update the selected posts or pages with the new images.
Remove Featured Images: If you wish to remove featured images from multiple posts or pages, choose the “Remove” option. This can be useful when you want to change your website’s design or when certain posts or pages don’t require featured images.
Set a Default Featured Image: In some cases, you may want to set a default featured image for posts or pages that lack one. With the “Set Default” option, you can choose an image that will be automatically assigned to the selected posts or pages without images.
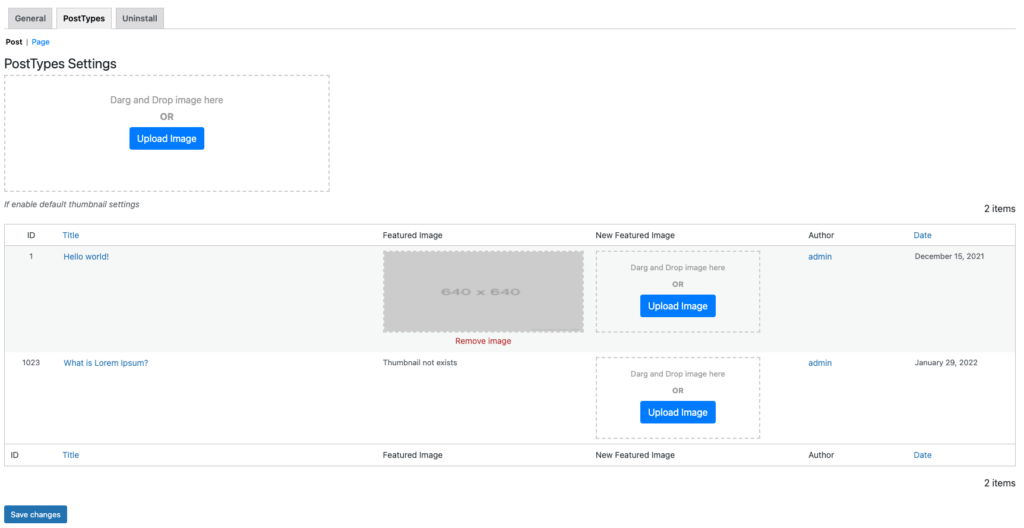
Preview and Apply Changes: Before applying the bulk edits, it’s essential to preview the changes to ensure everything appears as desired. The Bulk Featured Image plugin typically offers a preview feature, allowing you to review the modified posts or pages with their updated featured images.
Apply Bulk Edits: Once you’re satisfied with the previewed changes, it’s time to apply the bulk edits. Click the “Apply” or “Update” button provided by the plugin, and it will process the changes for the selected posts or pages, updating their images accordingly.
Enjoy Streamlined Workflow: Congratulations! You’ve successfully learned how to bulk edit featured images in WordPress. By leveraging the power of the Bulk Featured Image plugin, you can now save time and effort, efficiently managing the visual elements of your website.
Conclusion
With the ability to bulk edit featured images, you can enhance the aesthetics of your WordPress website effortlessly. By following the steps outlined in this guide and utilizing the Bulk Featured Image plugin, you’ll be well on your way to streamlining your workflow and maximizing the visual appeal of your posts and pages. Save time and boost your productivity while maintaining a visually captivating website.
If you have any questions write to us at F60 Host