
How to Edit Hosts File: A Beginner’s Guide

A Beginner’s Guide for Edit Hosts File:
The DNS (Domain Name System) is the internet’s phone book, as we all know. However, did you realize that your computer’s hosts file can also be utilized as a domain name directory? This post will explain what the hosts file is and how to update it to simulate a DNS change in Windows 10, Linux, and Mac.
What is a Hosts File?
In a nutshell, a hosts file is a local file that contains domain names and the IP addresses that correspond to them. It’s included in all major operating systems and serves as a map for identifying and locating IP network hosts.
Your computer will check the host’s file every time you visit a website to see which IP address it connects to. If the information is missing, your internet service provider will hunt up the resources needed to load the site in the DNS.
What’s the Point of Changing the Hosts File?
When you’ve recently purchased a domain, you can take advantage of the circumstances described above. Alternatively, if you’re moving your website to a new hosting provider and need your domain to point to the new server. It usually takes 24 to 48 hours for your domain to start working, and you won’t be able to view your site during that period.
You can access your website by modifying the hosts file and adding a custom IP address that links to your domain. This is useful if you want to modify your site after migrating and see how it’ll look on the new server.
The hosts file is formatted in plain text. As a result, you can change it using any text editor, such as Notepad.
Keep in mind, however, that the modifications will only affect the system where the hosts file is located.
Edit the Hosts File in Windows 10:
You’ll need an IP address for your domain before we start:
- Log into your cPanel account, then check for details about your hosting plan, server, and IP address in the left sidebar.
- Copy the IP address of the server:
Let’s go over to the hosts file and make some changes. For Windows 10, there are two options: manually or via the Hosts File Editor tool. In general, the instructions below can be used with any version of Windows.
Manually alter the file:
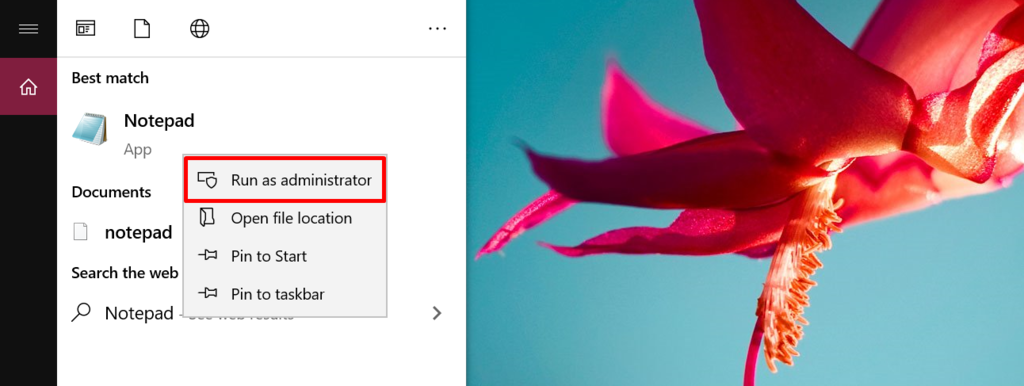
- Select Notepad from the Start menu. Run as administrator by right-clicking.
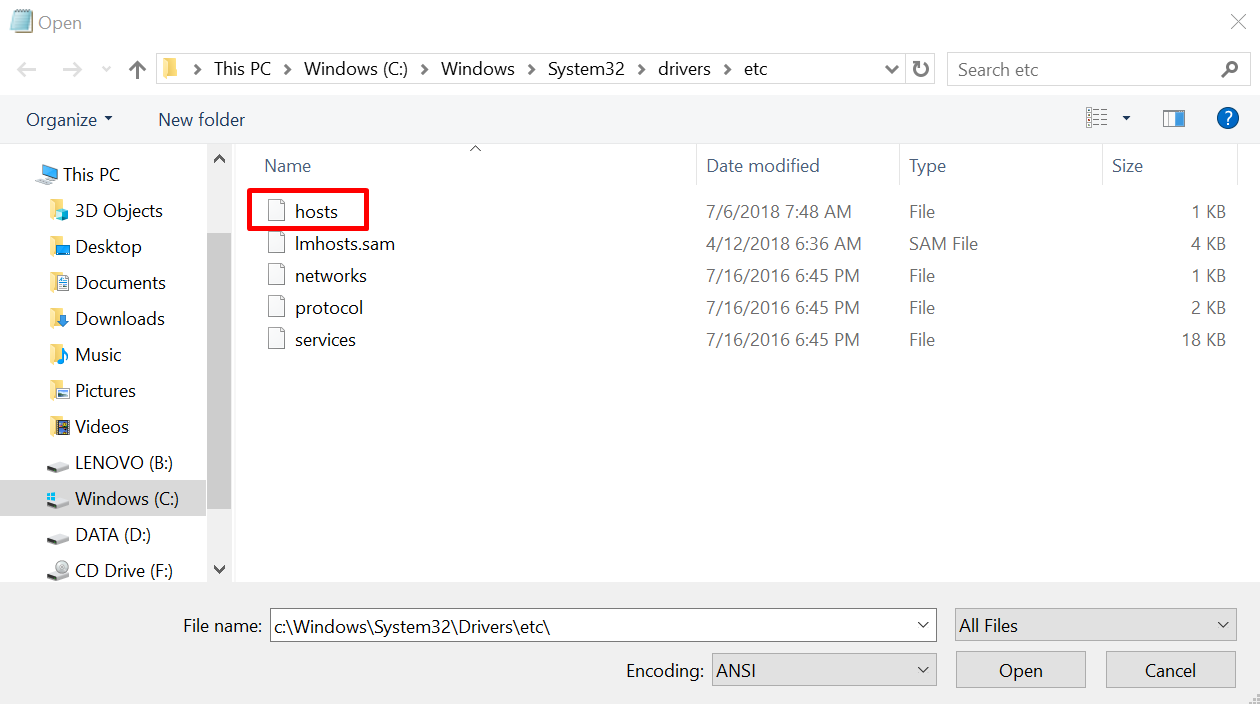
- Go to File -> Open once you’re in Notepad. To find the hosts file, navigate to C:WindowsSystem32Driversetc and choose All Files.
- The hosts file can now be edited. After a space, type your domain name, followed by the custom IP address you created previously.
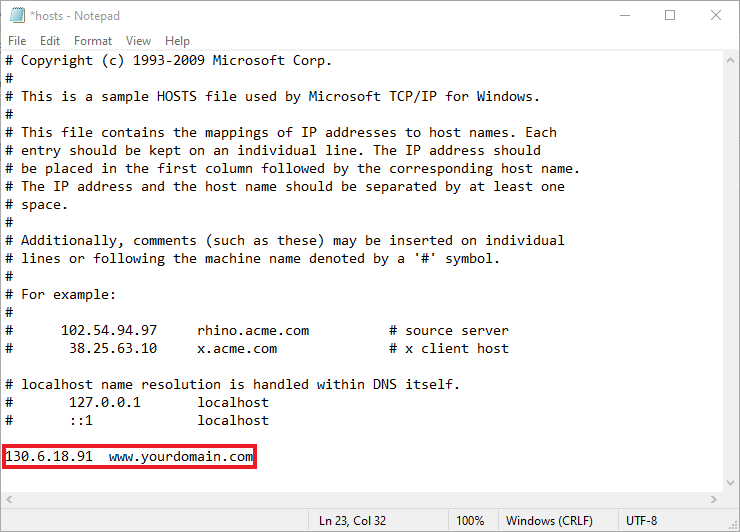
- Don’t forget to save your modifications when you’re finished.
Using Hosts File Editor Tool:
Using the Hosts File Editor is a more convenient approach to edit the hosts file in Windows 10.
- Once you’re in the Hosts File Editor, fill in the fields for your target IP address and domain name.
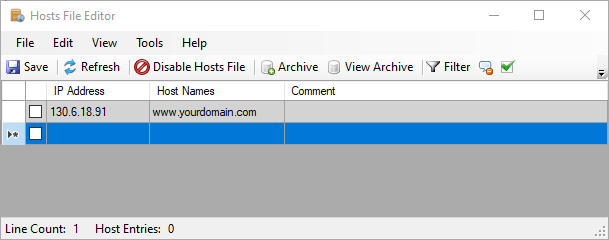
- Make a backup of your modifications.
In Linux, edit the hosts file:
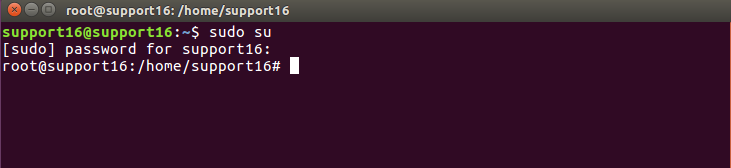
On Linux, you can complete the job with your favorite text editor. In this case, we’ll utilize Gedit in Ubuntu. By using Ctrl+Alt+T, you can access the Terminal.
- Type the following command, then enter your admin password:
sudo su
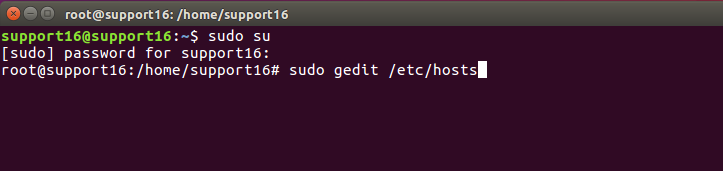
- Type the following command into Gedit and press Enter to access the hosts file:
sudo gedit /etc/hosts
- At the bottom of the hosts file, add the targeted IP address, a space, and then the domain name, just like in the Windows 10 instruction.
- Make a backup of your modifications.
In MacOS, open the Hosts File and make changes:
Follow these instructions to modify the hosts file if you’re running macOS from Leopard (10.6) to the most recent version:
- Open Terminal by clicking on the Launchpad.
The Nano editor will be used. Insert the following command to run it as an administrator:
- Enter the following statement:
sudo nano /private/etc/hosts
- Enter your password here. The hosts file will be directed to you.
- Add the IP address you want to use, followed by the domain name, separated by a space.
- Make careful to use the Ctrl + O shortcut to save your changes