How To Edit Footer Widgets In WordPress
Welcome, fellow WordPress enthusiasts! Today, we’re diving into the exciting realm of website customization, focusing specifically on editing footer widgets in WordPress. The footer is a valuable section of your website where you can showcase important information, enhance user experience, and promote engagement. So, let’s roll up our sleeves and explore how to make your footer widgets shine!

Understanding the Purpose of Footer Widgets:
When it comes to website design, every element plays a crucial role in shaping the user experience, and footer widgets are no exception. These humble sections at the bottom of your web pages hold immense significance in providing additional functionality, navigation, and information to your visitors.
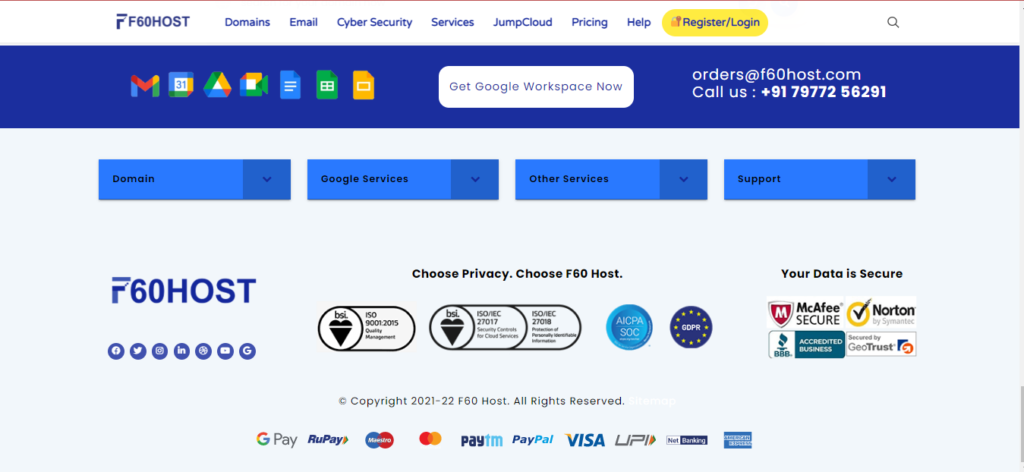
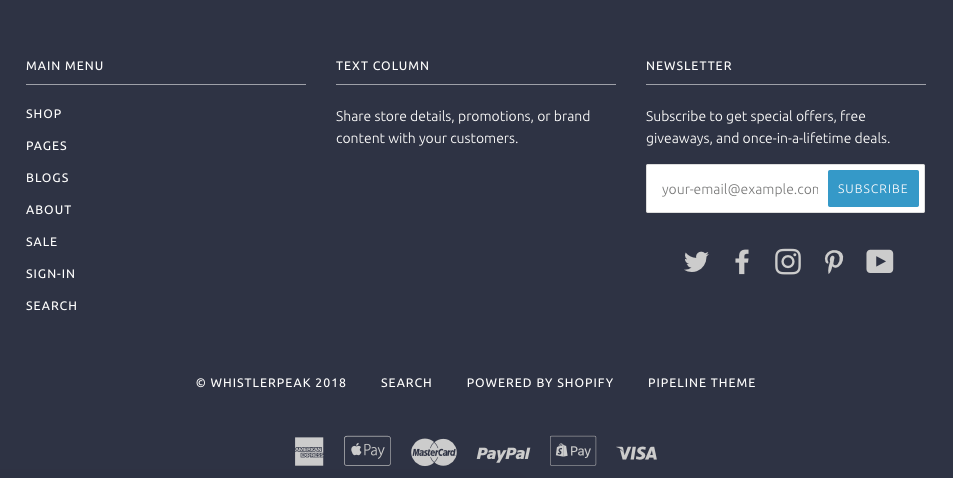
Footer widgets act as handy tools, offering quick access to important links, contact information, social media profiles, and more. They make it easy for users to navigate your website, find relevant content, and engage with your brand. Whether it’s displaying recent posts, a newsletter subscription form, or an interactive map, footer widgets serve as valuable resources, enhancing the overall usability and accessibility of your site.
So, don’t underestimate the power of these little helpers—they’re here to make your visitors’ lives easier and keep them coming back for more!

Locating and Accessing Footer Widgets:
When it comes to customizing your WordPress website, locating the footer widgets is the first step towards unleashing your creativity. Thankfully, finding these widgets is a breeze! In most cases, you can find them within the “Appearance” or “Customizer” sections of your WordPress dashboard.
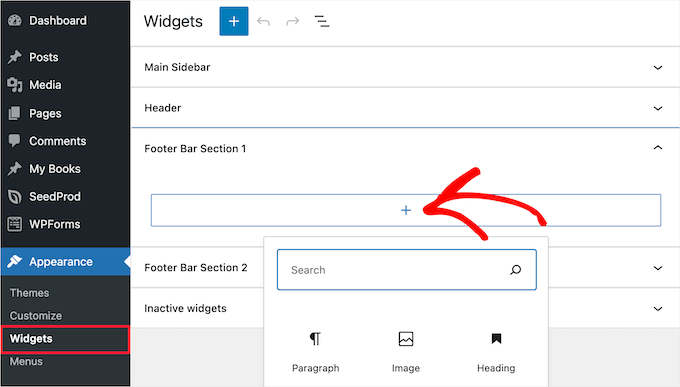
To access them, simply login to your WordPress admin panel and navigate to the “Appearance” tab. From there, you’ll likely find a “Widgets” sub-menu. Clicking on it will open up a world of widget possibilities, including the footer widgets. Some themes might have a dedicated section for footer customization within the “Customizer,” so keep an eye out for that too.
Once you’ve discovered these treasure troves, you can start shaping and molding your footer widgets to perfectly align with your website’s goals and aesthetics. Get ready to let your imagination run wild!
Step-By-Step Instructions For Accessing The Widget Management
When it comes to customizing your WordPress website’s footer widgets, you’ll be delighted to know that it’s a straightforward process. Here’s a simple step-by-step guide to help you access the widget management area and select the desired footer widget area for editing:
Step 1: Log in to your WordPress admin panel by entering your credentials.
Step 2: Once logged in, navigate to the “Appearance” tab located on the left-hand side of your dashboard.
Step 3: Within the “Appearance” tab, you’ll typically find a “Widgets” sub-menu. Click on it to access the widget management area.
Step 4: The widget management area will display a list of available widget areas on your website. Look for the footer widget area you wish to edit. It is usually labelled as “Footer” or “Footer Widgets.”
Step 5: To start editing the desired footer widget area, simply click on it, and a list of available widgets will appear.
Step 6: You can now add, remove, or rearrange widgets within the selected footer widget area by dragging and dropping them or using the widget configuration options provided.
Step 7: Once you have made the desired changes to your footer widgets, remember to save your changes by clicking the “Save” or “Publish” button.

By following these step-by-step instructions, you’ll easily access the widget management area and select the specific footer widget area you want to edit. Now, let your creativity flow and customize your footer widgets to make your website truly stand out!
Exploring Widget Customization Options:
When it comes to customizing your WordPress website’s footer widgets, you’ll be amazed by the array of options at your fingertips. The customization possibilities are endless, allowing you to create a footer that perfectly reflects your brand’s identity and caters to your specific needs.
First and foremost, you have the power to add, remove, and rearrange widgets within the footer area effortlessly. Whether you want to showcase your social media icons, recent posts, or a subscription form, it’s just a matter of drag-and-drop or a few clicks away.
But the customization journey doesn’t stop there. Widget settings play a vital role in tailoring the appearance and functionality of your footer widgets. You can tweak the titles, ensuring they convey the right message and resonate with your audience.
Styles and colours can be adjusted to match your brand’s aesthetics, creating a cohesive look throughout your website. Additionally, widget layouts provide options to organize and structure your footer widgets, be it in a single column, multiple columns, or a grid format.
With these versatile customization options, you have the freedom to sculpt your footer widgets to perfection, making a lasting impression on your visitors. So, go ahead and experiment with titles, styles, colours, and layouts until you achieve the desired results that truly represent your brand’s uniqueness.
Adding Widgets to the Footer:
Let’s dive into the exciting process of adding widgets to your WordPress footer area! Fortunately, WordPress makes it incredibly easy to customize your footer widgets, giving you multiple options. One of the simplest methods is using the drag-and-drop functionality.
Within the widget management area, locate the desired widget and drag it to the footer widget area. You can also utilize widget configuration options by clicking on the widget and adjusting its settings to suit your needs. Now, let’s explore some popular footer widgets that can elevate your website’s functionality and engagement.
Social media icons allow visitors to connect with you on various platforms, expanding your online presence.
Recent post widgets give a glimpse of your latest content, enticing readers to explore more.
Newsletter subscription forms help you build a loyal subscriber base, allowing you to keep your audience updated with exciting news and promotions.
Lastly, including contact information in your footer widgets makes it convenient for visitors to reach out to you easily.

These popular footer widgets not only enhance user experience but also help you achieve your website’s goals. So, get creative and incorporate these widgets into your footer area to make a lasting impression on your audience.
Styling and Designing Footer Widgets:
When it comes to styling your footer widgets, the goal is to ensure they seamlessly blend with your website’s overall aesthetic. By paying attention to details such as font choices, colours, and background customization, you can create a cohesive and visually appealing footer that leaves a lasting impression. To start, consider selecting fonts that align with your brand’s personality and are easy to read.
Opt for a font style that complements your website’s theme and enhances legibility. Next, pay attention to colours. Choose a colour palette that harmonizes with your overall website design. Consider using your brand’s primary or complementary colours to maintain consistency.
Additionally, think about the background of your footer widgets. It can be a solid colour, a gradient, or even a subtle pattern that complements the overall design. Remember to strike a balance between eye-catching and distracting. Experiment with different colour combinations and backgrounds until you find the perfect match.
By styling your footer widgets to match your website’s aesthetic, you create a cohesive, professional look that captivates visitors. So, take the time to explore different font choices, play with colours, and experiment with backgrounds to achieve a visually stunning footer that perfectly aligns with your website’s overall vibe.
Conclusion:
Congratulations, you’ve unlocked the power of editing footer widgets in WordPress! By customizing this crucial section of your website, you can create an engaging and informative user experience while strengthening your brand identity. Remember, the possibilities are endless, so let your creativity flow and enjoy the process of transforming your website’s footer into a user-friendly haven. Happy widget editing!
If have any doubts Write Us On LinkedIn
