
How to Activate Gmail in Google Workspace

Need assistance to activate Gmail in Google Workspace (formerly G Suite) for your website so you can have a highly qualified Gmail account?
One of the most notable features of Google’s Workspace service is that it host your email for you and allows you to use the Gmail interface with your own domain name (e.g. you@yourdomain.com), giving you a professional email address.
Google Mail allows you to send emails using your own unique domain name.
Google Workspace contains all of your favorite productivity apps like Gmail, Calendar, Drive, Docs, Sheets, Slides, Meet, and many more.
That makes it an excellent choice for email hosting for your WordPress site, though this guide is not limited to WordPress users.
In this tutorial on how to set up Google Workspace (formerly G Suite), I’ll walk you through every step of the process of getting Google Workspace to work with your website and running your professional email address.
In four steps, learn how to set up Google Workspace (G Suite).
Below is a quick rundown of the steps required to configure Google Workspace with your website and professional email address:
Step 1: Create an account and follow the Google Workspace setup wizard.
Step 2: Introduce new users to your account (optional).
Step 3: Insert a TXT record to your DNS records to verify domain ownership with Google.
Step 4: Configure email by adding MX records.
Here’s how to get Google Workspace up and running…
Add Gmail MX Records:
You must first add the MX Records to your DNS zone before you can activate Gmail. Here’s how to use cPanel to add Google Workspace MX records.
Step 1: Sign in to your cPanel.
Step 2: In the Domains section, click the Zone Editor link.
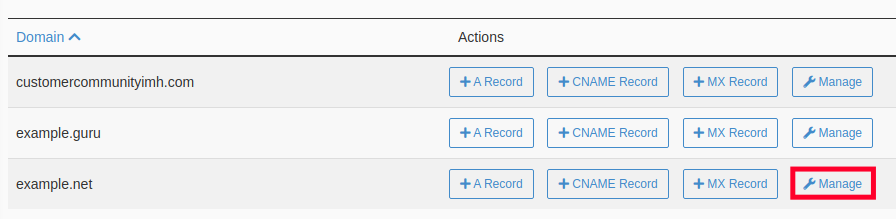
Step 3: Next to the domain you want to use with Gmail, click the Manage button.
Step 4: Click the MX option next to Filter.
Step 5: Delete any MX records that appear on the list.

Step 6: A pop-up notification will display asking you, “Are you sure you want to delete this record?” Continue by clicking the Continue button.
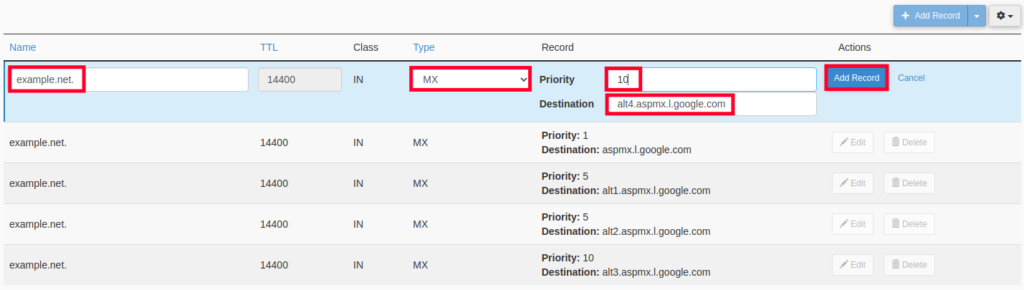
Step 7: Now, at the top of the table, click the +Add Record button.
Step 8: Fill out the form below and click the Add Record button. Steps 7 and 8 must be repeated for each of the five MX Records.
Activate Gmail:
Now that we’ve established the MX records, we’ll show you how to activate Gmail in Google Workspace.
Step 1: Enter your Google Workspace Admin Console credentials.
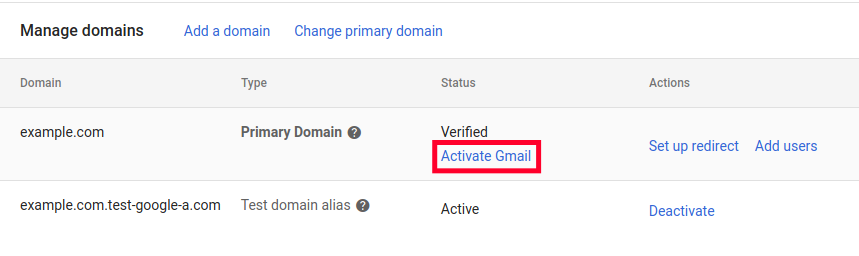
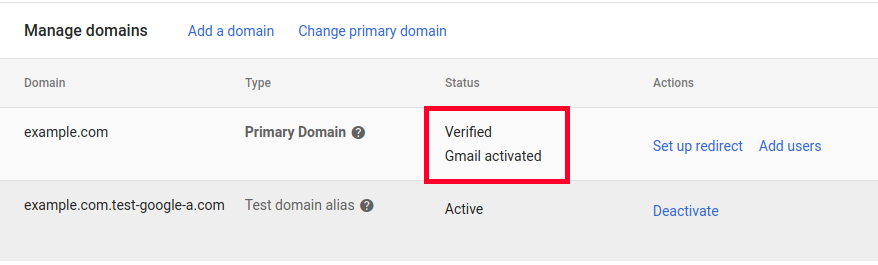
Step 2: In the navigation menu, select Account, Domains, and then Manage domains.
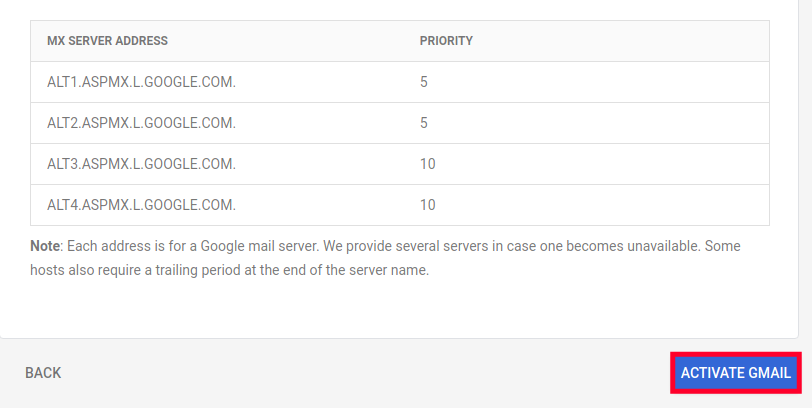
Step 3: When you see your domain, click the Activate Gmail button.
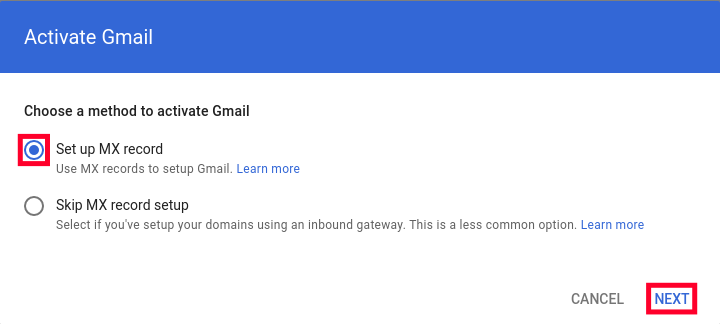
Step 4: A pop-up notification will display asking you to “Select a method to activate Gmail.” Click the Next button after selecting the Set up MX record option.
Step 5: With the next screen, check the boxes to confirm that you have added all of your domain’s email addresses and are ready to receive an email for your domain at Gmail. These are the typical configurations.
Step 6: Simply click the blue Activate Gmail button to confirm your settings.
Step 7: Your domain status will then be listed as Verified with Gmail enabled.
You have now successfully activated Gmail for your domain. You can now start managing your email accounts in Google Workspace. More guides to help you manage your Google Workspace account can be found in our Google Workspace section.
More information
For more information about Google G Suite/Workspace domains, Server, Hosting, check out these F60 Host resources: