Google Site Verification: 9 Ways How to Verify Site with Google Search Console
9 Ways to Verify Your Site With Google Search Console
Do you want to use Google Search Console to manage your website? Google requires you to authenticate your site ownership before you may add it, see its stats, or submit its sitemap. In this article we will guide you regarding Google Site Verification: 9 Ways to Verify Your Site With Google Search Console.
In essence, Google site verification entails demonstrating that you are the owner of the website. As a result, you must complete the Google Search Console authentication procedure before using Google tools to manage your sites.
Thankfully, this procedure is straightforward, and you may validate your website with Google Search Console in a variety of methods. This article will go through nine various Google site verification techniques, including manual verification and WordPress plugins.
Verify site Google Search Console.
Five Manual Methods for Google Site Verification
These manual Google site verification methods work for all websites, including WordPress sites.
To get started, access your Google Search Console dashboard. From here, you can open your property list to the left and click Add property to verify a new website:
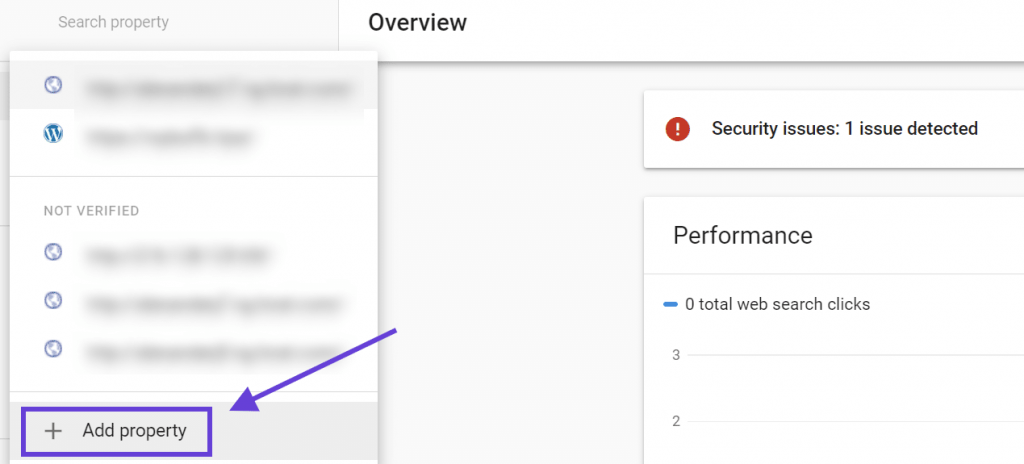
Adding a property to Google Search Console.
Search Console will ask you to select a property type. You can enter a domain or a URL prefix. If you enter a domain name, you’ll be able to verify your website via DNS. The URL prefix method will let you choose between four verification methods:
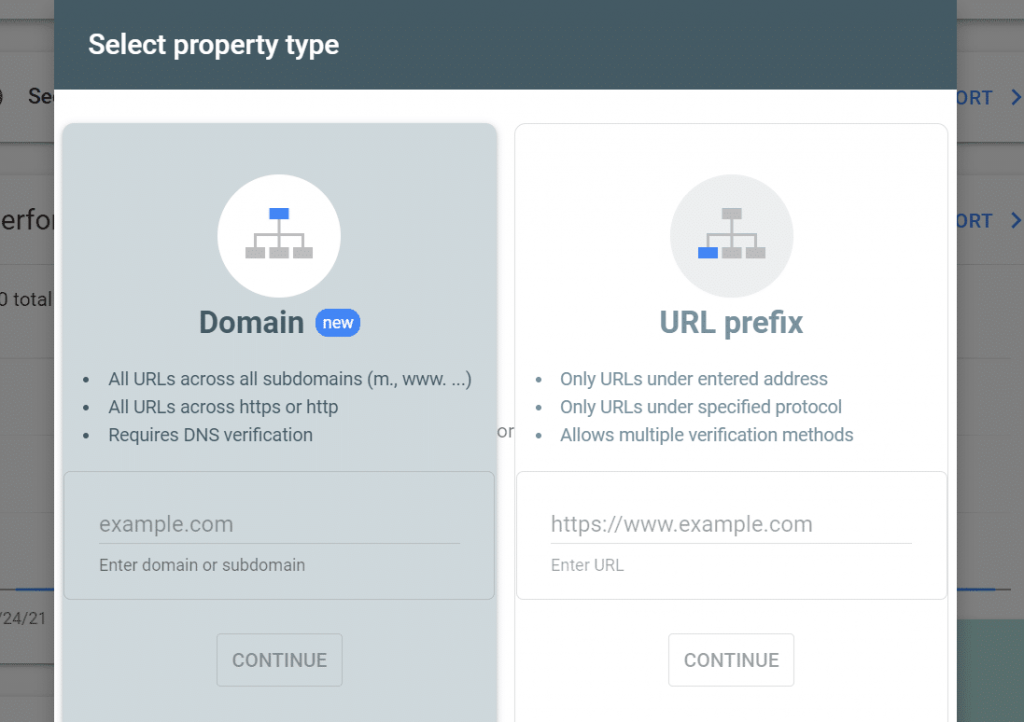
Selecting a property type in Search Console.
When it comes to site verification, any method will suffice. The URL prefix technique, on the other hand, is recommended since it provides you more possibilities.
The four verification techniques for selecting the URL prefix property type are discussed in the next section. Finally, we’ll teach you how to use DNS to validate your website (the Domain option). Enter your website’s URL in the URL prefix field and click CONTINUE.
1. HTML Verification File
This approach requires you to upload an HTML file to your website’s root directory. It’s straightforward, but you’ll need access to your server to upload the file, which you can accomplish with FTP/SFTP clients or cPanel File Manager.
Step 1: Download the Verification File
After you add your site to Google Search Console, you should see an option to download an HTML verification file in the Recommended verification method tab:

Download a verification file from Google Search Console.
Click on the button next to Download the file. Save this file somewhere you’ll remember — you’ll need it in a minute.
Step 2: Upload the File via SFTP
Once you’ve successfully connected, upload the file that you downloaded from Google to the root folder of your site (this is the folder that contains the wp-content folder, wp-config.php, etc.) After uploading the file, it should look something like this:

Upload verification file via FTP/SFTP.
Once the file is in your site’s root folder, return to Google Search Console. It’s time to verify your property.
Step 3: Click the Verify Button in Google Search Console
Once you’ve uploaded the file to your site, go back to Google Search Console and click on the VERIFY button to complete the process. Google Search Console will locate the file on your server and verify that you own the website.
2. HTML Tag
With the HTML tag method, you need to add a simple meta tag to your site’s <head> section. If you’re using WordPress, you can do this by:
- Adding the tag directly to your child theme’s header.php file
- Using a plugin to inject it into the header
We’ll show you how to do this using the plugin method, but it’s also OK to add it directly to your theme as long as you’re using a child theme (if you don’t use a child theme, you’ll lose your Google site verification every time you update your theme).
Step 1: Copy the Meta Tag
To find the meta tag, you can go to the Other verification methods section in the Google Search Console interface:

The HTML meta tag.
Use the COPY button to copy the meta tag in the box. Now, let’s go ahead and add it to your WordPress website.
Step 2: Add the Meta Tag Using Insert Headers And Footers
Next, you can install the free Insert Headers and Footers plugin on your site. Navigate to Settings > Insert Headers and Footers and paste the meta tag in the Scripts in Header box:
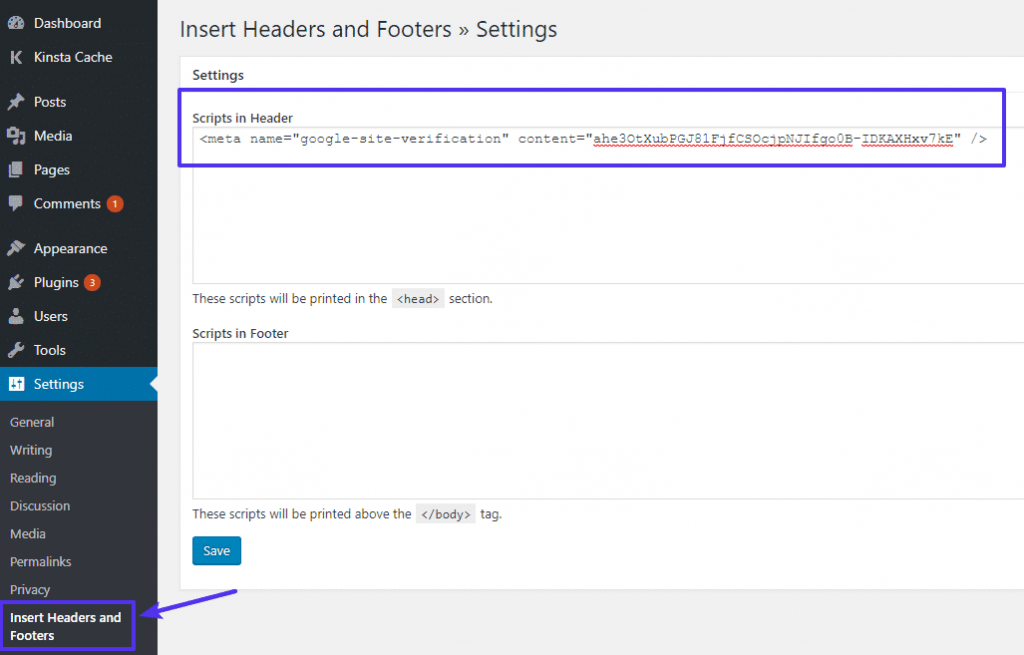
Add HTML meta tag to Insert Headers and Footers plugin.
Click on Save to save the changes to your website’s header, and that’s it. You can also add the meta tag manually, but we recommend the plugin approach if you’re not comfortable editing WordPress core files.
To finish the process, go back to the Google Search Console interface and click on the VERIFY button. If you added the code to your website, Google Search Console would be able to identify it.
3. Google Analytics
If you already have the Google Analytics asynchronous tracking code installed on your site, you can easily verify your site using Google Analytics. This process boils down to two simple steps:
- Select Google Analytics under Other verification methods.
- Click on VERIFY.

Google Analytics account verification screen.
If you added Google Analytics to WordPress using a plugin, the tracking code should be on your homepage. That means that you can go ahead and use this method.
4. Google Tag Manager
Just like Google Analytics, if you’re already using Google Tag Manager, you can verify your site with just a single click. You’ll need to have the Google Tag Manager container snippet active on your site.
Again, there’s no deep or involved process necessary. Here’s all you need to do:
- Select Google Tag Manager under Other verification methods.
- Click on VERIFY.

The screen to verify your Google Tag Manager account.
If you’re using Google Tag Manager, this method will enable you to verify your website on Search Console almost immediately.
5. DNS Verification
If you want to verify your website using the Domain method, you’ll need to add a TXT record to your domain’s DNS configuration. Here’s what that verification window looks like:
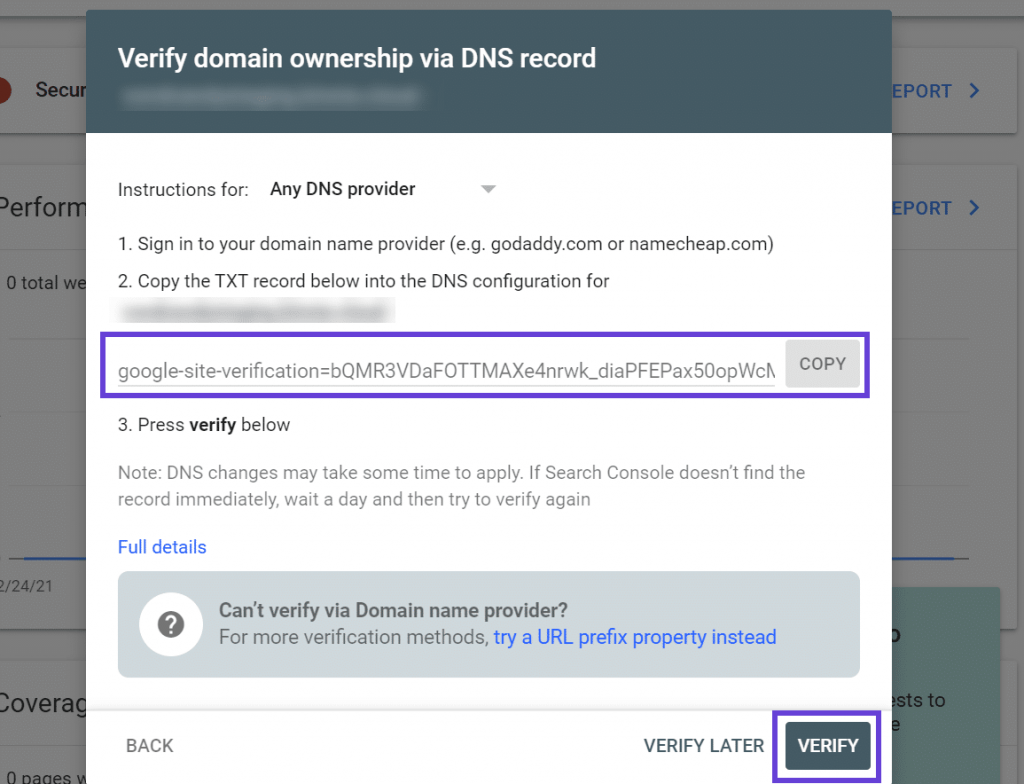
Google DNS Verification Modal
It is more difficult, but it is the only way to certify a Domain property. If your domain provider is listed in the verification wizard, the process is straightforward. Domain properties are useful since they offer data about your property’s protocol (http/https) and subdomain variations.
4 WordPress Plugins to Help With Google Site Verification
If you’re using a WordPress SEO plugin, there’s a good chance that your plugin of choice offers an easy tool to help with Google site verification. We’ll show you how to do it with the three popular WordPress SEO tools and one plugin directly from Google.
6. Yoast SEO 🔗
To complete the Google Search Console verification process with Yoast SEO, you can start by going to SEO > General in your WordPress dashboard and selecting the Webmaster Tools tab.
Next, find the Google verification code field and add the code that you can get from Google Search Console:
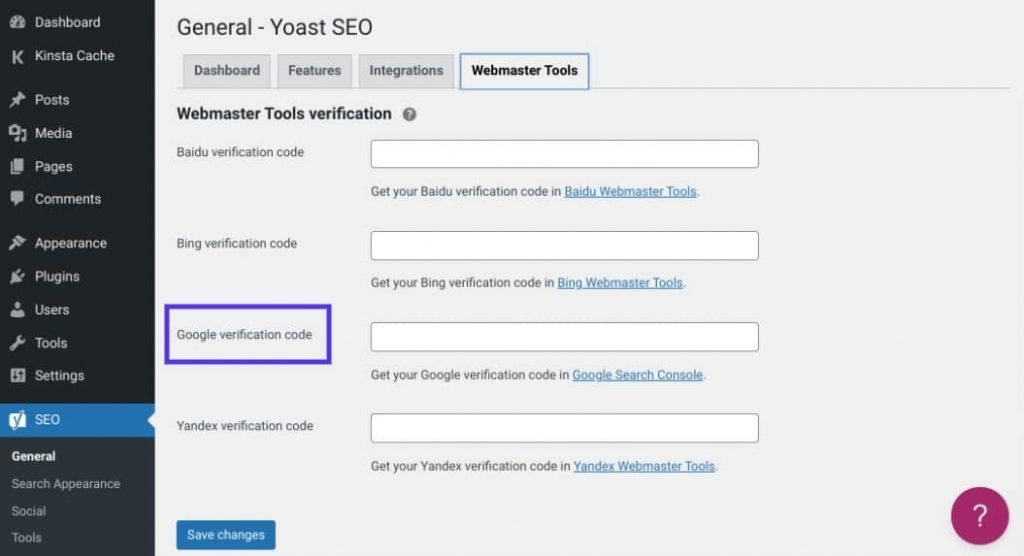
Google site verification in Yoast SEO.
To find your Google Search Console verification code, you can follow these three steps:
- Navigate to the Other verification methods section in the Google Search Console interface.
- Select the HTML tag option.
- Copy the entire tag. Yoast SEO will automatically strip out the extra details, leaving just the code.
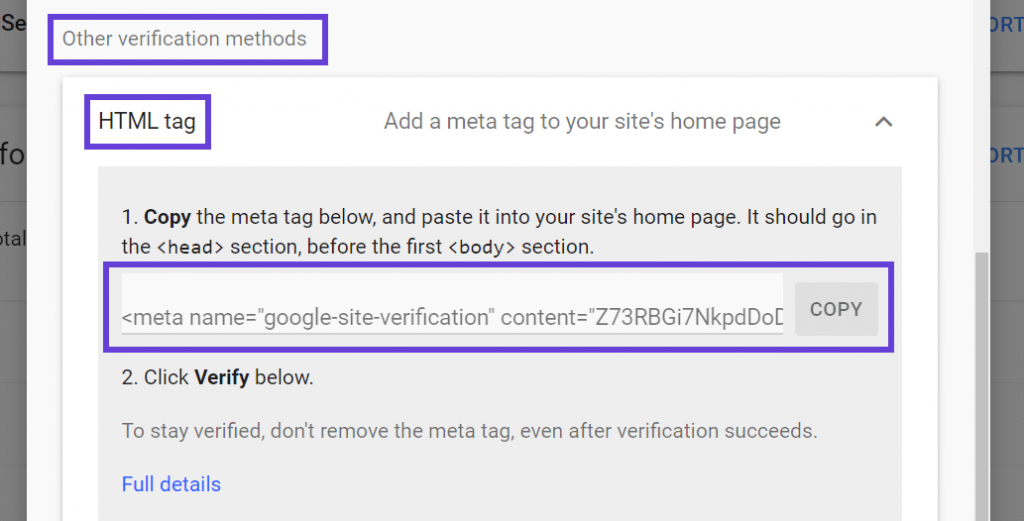
Where to find Google verification code.
Now you can add the code to your Yoast SEO settings page and save the changes to it. Return to the HTML tag tab in Google Search Console and click on the VERIFY button.
7. SEOPress 🔗
To verify your site in Google Search Console with the SEOPressor plugin, go to the SEOPress > Advanced section in your WordPress dashboard. Here, scroll down to find the Google search verification entry.
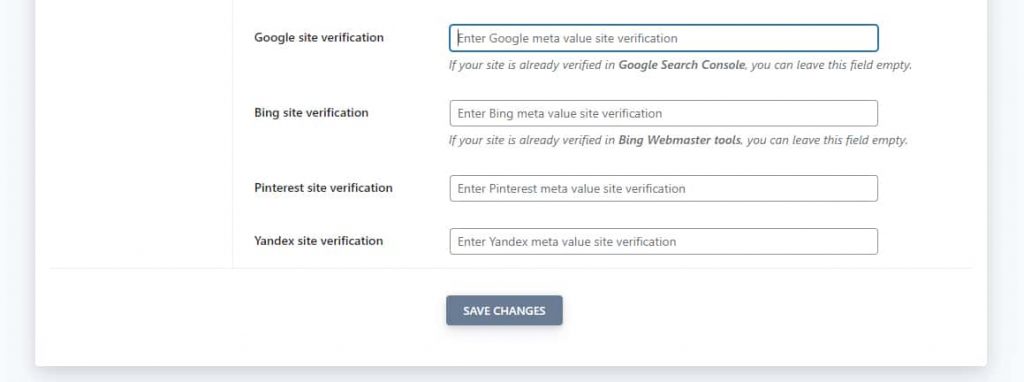
SEOPress simplifies the Google site verification process.
You need to enter your Google site verification HTML meta tag here. It’ll look something like this: <meta name=”google-site-verification” content=”…….” />. Add your site verification meta tag and save the changes.
We’ve discussed how to get this meta tag for your site (or “property” as Google calls it) in the HTML Tag section above.
Now, the plugin will automatically add this HTML tag to all your site’s pages.
Finally, click on the VERIFY button under the HTML tag section in Google Search Console.
8. Rank Math SEO 🔗
If you’re using the Rank Math SEO plugin, you can verify your website in Google Search Console by going to Rank Math > General Settings > Webmaster Tools in your dashboard. Here, you’ll see a field that reads Google Search Console, which is where your Search Console verification code goes:
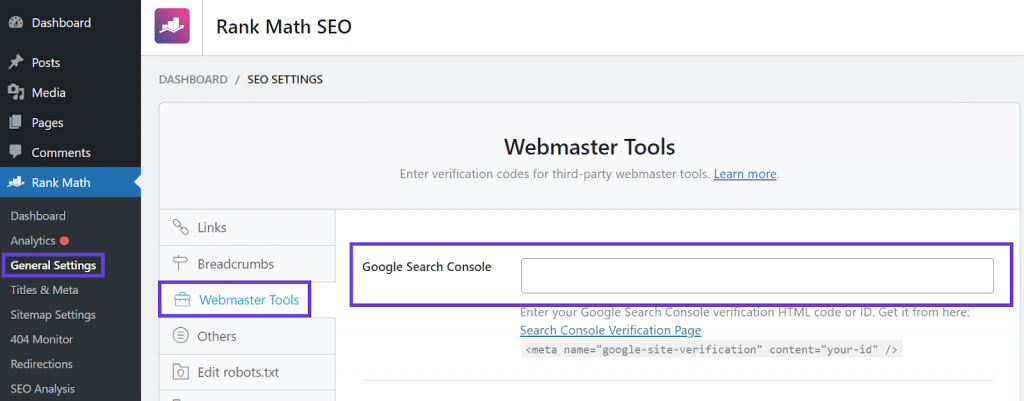
Adding the Search Console verification code to Rank Math.
To find that verification code, you can follow the exact instructions as with other WordPress SEO plugins. Navigate to the Other verification methods section in the Google Search Console interface, and then select the HTML tag option. After you copy the entire tag, Rank Math will automatically identify the verification code.
Next, return to Google Search Console and click the VERIFY button under the HTML tag. Search Console should recognize your website now.
9. Site Kit by Google 🔗
The Site Kit by Google plugin enables you to connect your WordPress website with Google services with only a few clicks. It’s an official plugin, and you can use it for free.
Once you install and activate the plugin, navigate to Site Kit > Dashboard in your dashboard and select the SIGN IN WITH GOOGLE option:
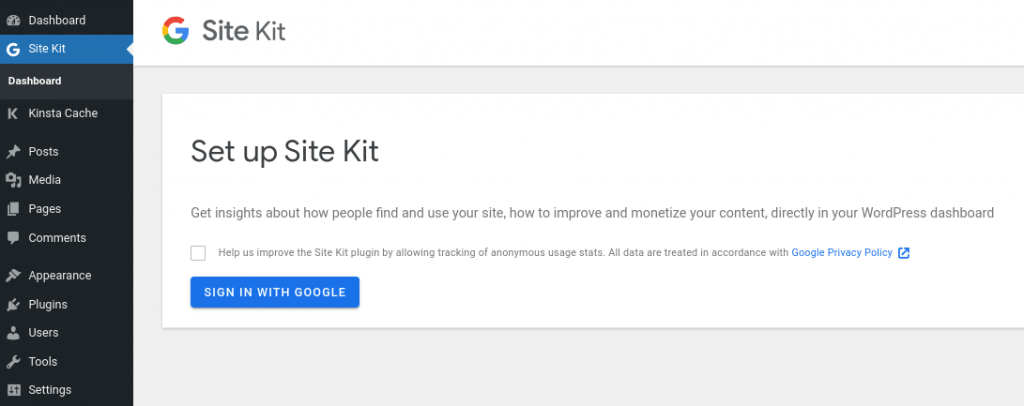
Signing in with Google through the Site Kit plugin.
Google will prompt you to verify website ownership and to connect it with Search Console. To proceed, click on Sign in with Google once more:
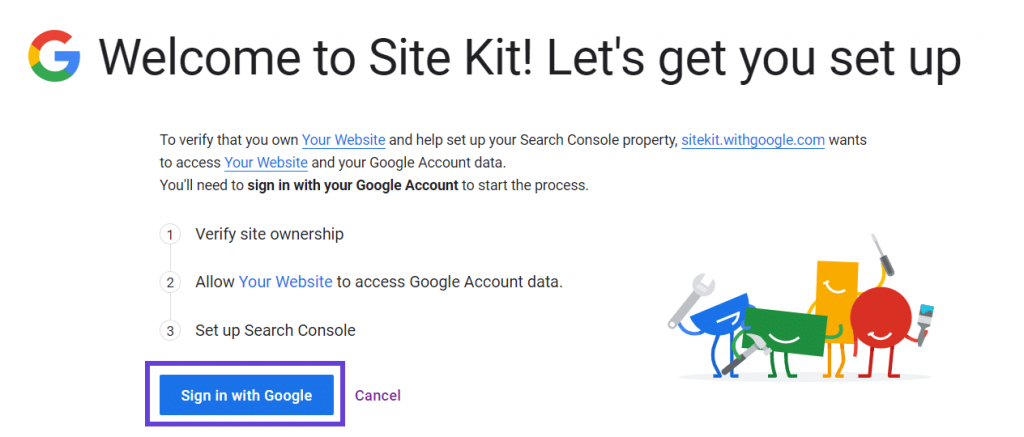
The Site Kit setup wizard.
If you have multiple Google accounts, you’ll be able to choose which one you want to use for the Search Console account connected with your website. Google will ask you to confirm that you’re comfortable with Site Kit having access to the following types of data:
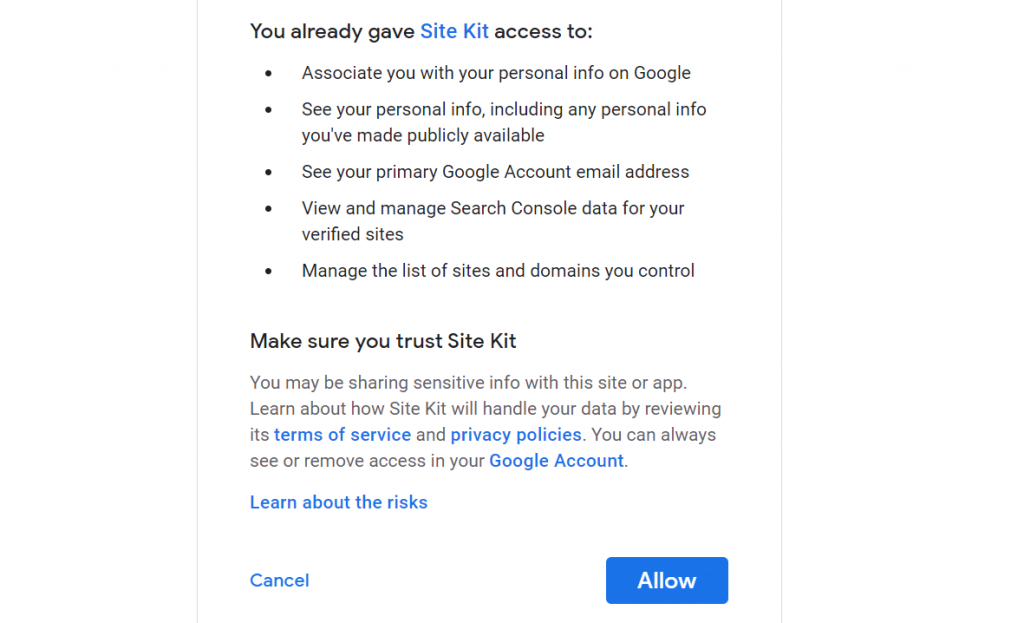
An overview of Site Kit’s permissions.
After you click on Allow, Site Kit will ask you to confirm site ownership for Google Search Console. Site Kit does this by adding a bit of HTML code to your website. All that you have to do is select Proceed:
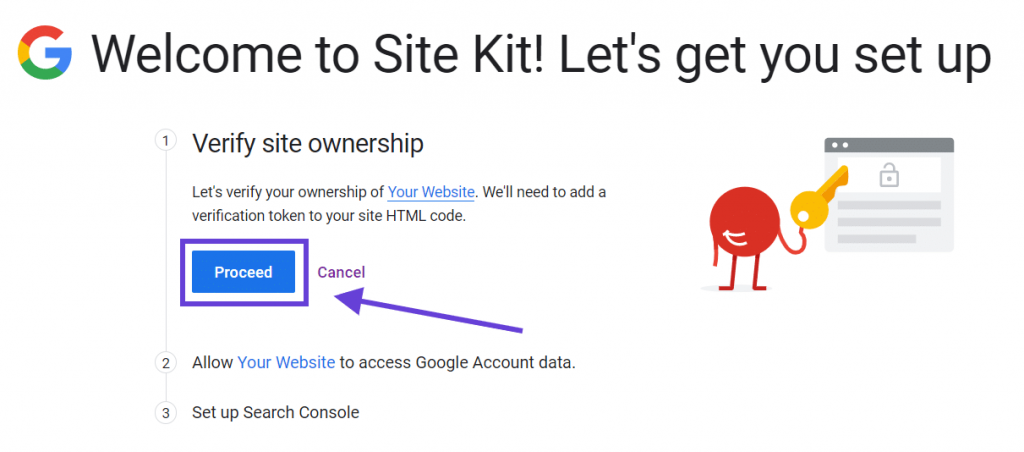
Enable Site Kit to verify that you own your website.
Moving on, Site Kit will ask you for permission to and your Google account data and display it on your dashboard. Click the Allow button once more. Then you’ll see a success message telling you that your website is verified on Google Search Console:
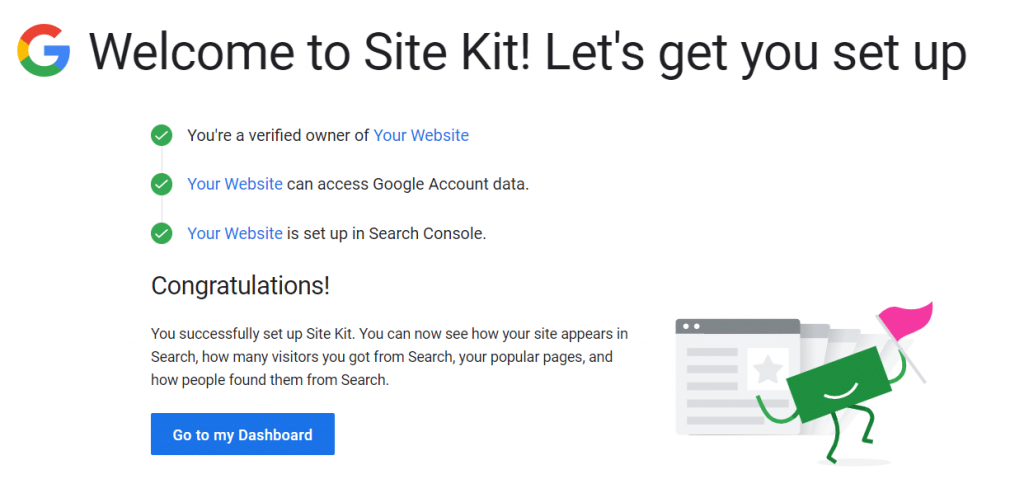
A Site Kit setup success message.
When you return to your Site Kit dashboard in WordPress, you’ll see that it’s connected to Google Search Console. A new Site Kit > Search Console tab will appear in your dashboard, giving you access to data from within your website.
Which Method Should You Use?
It merely takes a few seconds to add a website to Google Search Console. However, it would be beneficial if you confirmed that you own the site, which might vary in difficulty depending on the technique you use.
According to me the HTML Code is the best option to go with as is easy and handy.
You already have some Google code on your site if you use Google Analytics or Tag Manager. Without you having to do anything extra, Google Search Console should recognise that code and verify your website. You may also use an HTML file, a tag, or DNS verification (which is the best option if you don’t want to add any additional code to your site).
Finally, the most popular WordPress SEO plugins incorporate Google Search Console verification tools. These will assist you in validating your website. All you have to do is enter a verification code.
Article on Google Ads: Make your Google Ads more targeted.
