How to Redirect a Domain in cPanel
Redirect a Domain in cPanel
The Redirect a Domain in cPanel is the most crucial duty of a web server managed by cPanel & WHM is serving web pages in response to HTTP requests, which is dependent on the correct configuration of domain names and IP addresses. Manually configuring IPs and domains is a pain, but cPanel & WHM online
interface makes common web server management tasks a breeze.
In this article, we’re going to explore four aspects of IP and domain name management:
- Adding a new IP address and redirecting it to a domain.
- Adding a new domain in cPanel.
- Configuring domain redirects in cPanel.
- Configuring domain forwarding in WHM.
Finally, we’ll teach you how to clear the DNS caches on your operating system, which will solve a problem that many users encounter when changing their IP and domain configurations.
Steps For Redirect a Domain in cPanel
You might want to add a new IP address to your server for a variety of reasons. You may want to assign a static IP address to a cPanel user or reseller or let a site function from a dedicated IP address.
To add an IP address to a web server, you need:
- Access to its root account; we’ll be working in WHM.
- A new IP address from your hosting provider. They will set up their network to associate the IP with the server.
Step 1: First, we’ll inform cPanel & WHM of the IP address so that they may set up the server and make the IP address available for usage with websites and other services.
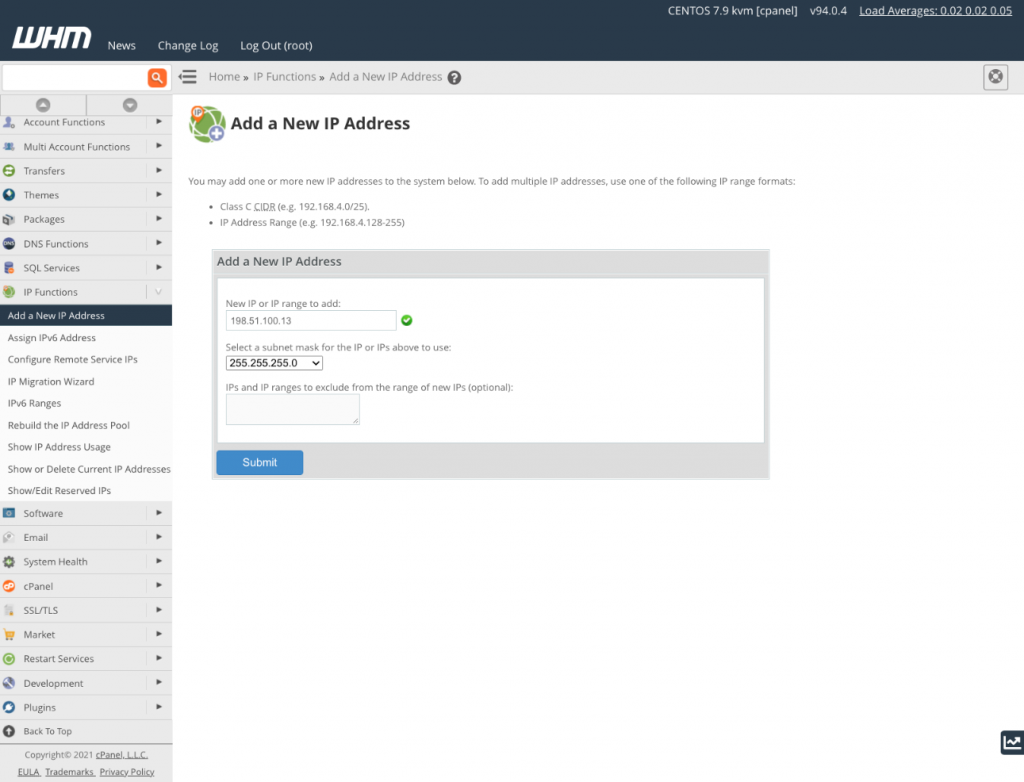
Step 2: Navigate to Add a New IP Address under IP Functions in the WHM sidebar menu.
Step 3: Fill in the new IP address as well as the subnet mask. Ask your hosting provider if you don’t know the subnet mask to use. The mask specifies which portion of the address is for the network and which part is for the network’s devices. The subnet mask for each IP on your server should be the same, regardless of the host’s setup.
Step 4: To finish, click Submit. If you make a mistake, go to Show or Erase Current IP Addresses and delete the new address.
Step 5: You may now correlate the address with hosting and reseller accounts, as well as individual websites. We’ll teach you how to change the IP address of an existing site to the new one.
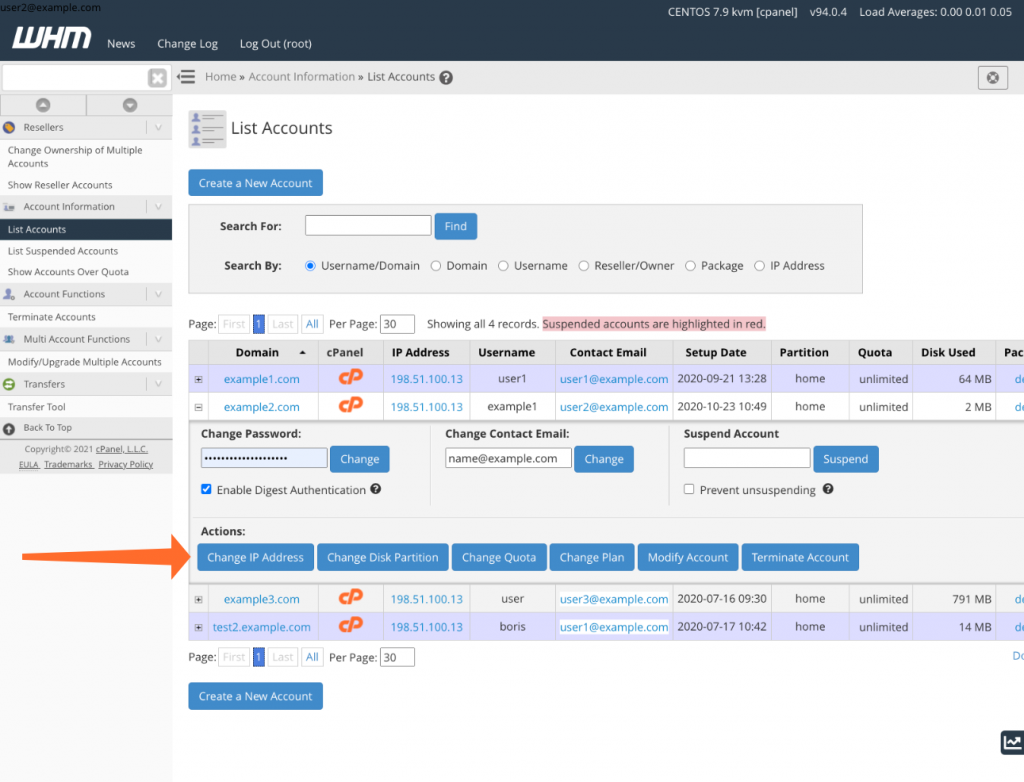
Step 5: The Account Information submenu will open the List Accounts page. Select the account that is linked with the domain you wish to update and click the “+” next to it.
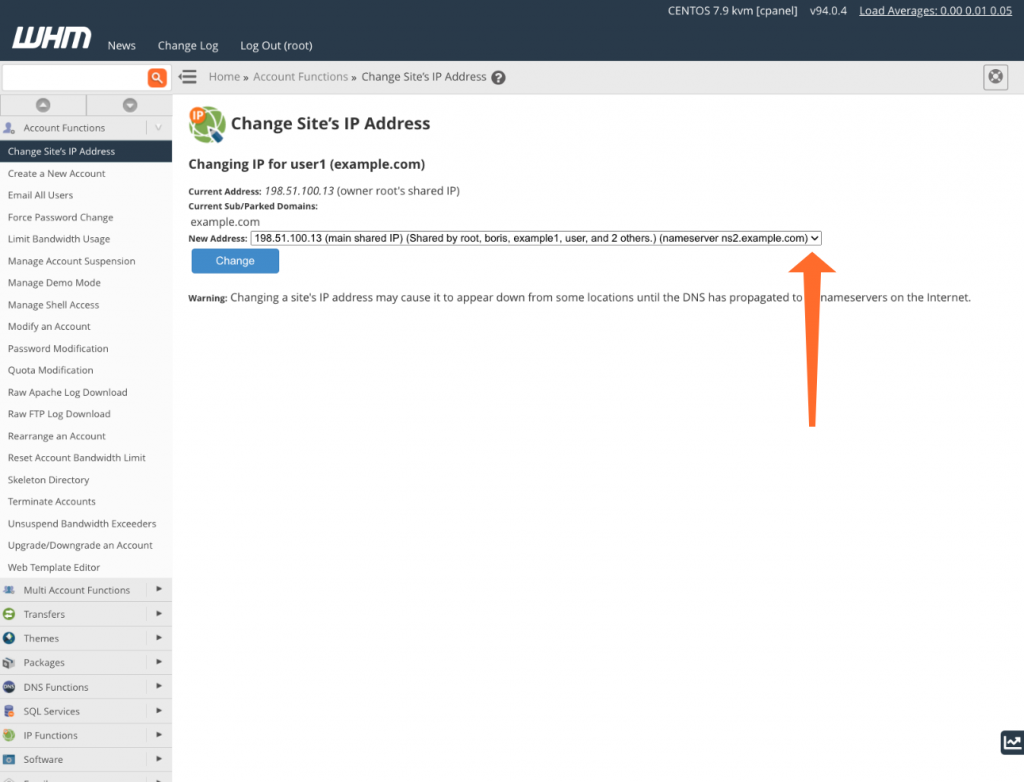
Step 6: Click the Change IP Address button, and then select the IP we just added from the drop-down menu.
Changing the site’s IP will make it unavailable at its old IP, and should expect it to appear offline for some time.
How to Add a New Domain to cPanel
- Log into your hosting cPanel.
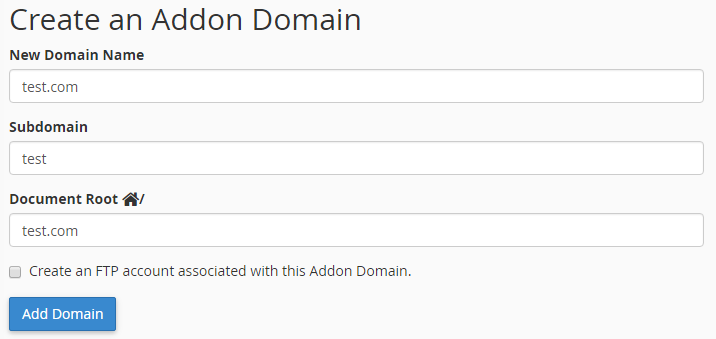
- Click on Addon Domains, located under the Domains section.
- Enter the domain in the New Domain Name section.
- Once the domain is entered, click The Subdomain field and the Document Root (usually public_html/domain.com) will automatically fill in. Check “Create an FTP account associated with this Addon Domain” if you want an FTP added. The FTP account would only have access to that specific Addon domain and nothing more.
- Click Add Domain
After that, you’ll need to add the appropriate DNS entries. You can add DNS records later if you like, but any Addon domains will not connect or operate until DNS records have been uploaded.
How to add DNS records to Addon domains:
- Return to your Name.com account’s Web Hosting Dashboard page. Your Addon domains will be instantly synchronised, but you may need to refresh the page to see them.
- In the DNS Management section, select your Addon domain from the menu.
- Select DNS Templates from the drop-down menu. By default, the Hosting template will be picked.
To add DNS records, click the Confirm button.
More information
For more information about Google G Suite/Workspace domains, Server, Hosting, check out these F60 Host resources:

