
How to Setup Google Tag Manager

Set Up a Google Tag Manager Account
When you’re building a website, Google Tag Manager can help you manage all of the tags you’re using. Tags are javascript files (typically used for tracking) that pull data from third-party services like Google Analytics, DoubleClick Floodlight Counter, or Adwords. This can cause site load times to slow down because it must wait for a response from the third-party scripts before it can fully load your page.
A container tag is placed on each page of your website, and it pulls all of the tags from Google Tag Manager that you have configured. This not only makes it easier to add and remove scripts from your website, but it can also improve load times.
What are Google tags?
Tags are bits of code that you embed in your website’s javascript or HTML to extract specific information.
Tag information that marketers require typically includes how long users spend on a page on your site, form submissions, how they arrived on your site, which links they clicked, and even what products they removed from their shopping cart.
Each tag monitors a different aspect of the situation. For example, you could create a tag solely to track how many people fill out the form on your “Contact Us” page. That tag can then send more specific data to Google Analytics, AdWords, or another third party.
Unfortunately, manually coding tags can be a time-consuming and difficult process for marketers without much development or coding experience, and filling out tickets for the IT department is time-consuming.
Google Tag Manager makes the entire tagging process much easier. All you have to do is embed a code into your site pages once, and Google Tag Manager will code and embed it for you each time you want to create a tag.
Here’s what you do:
1. Sign up for an account.
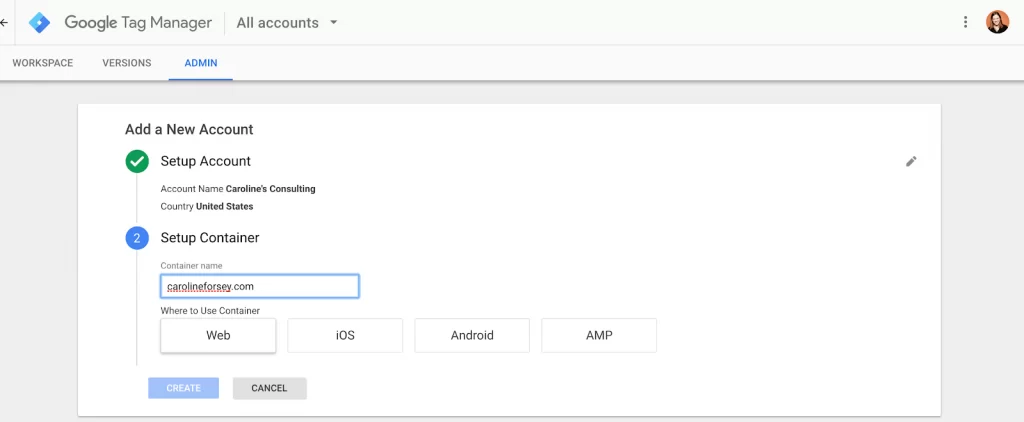
Go to Google Tag Manager and select the green “Sign Up for Free” button. It will prompt you to enter your account name (company), country, website URL, and the location where you want to use Google Tag (web, iOS, android, AMP). When you’re done, press the blue “Create” button.
2. Coding Instructions To Follow
Following that, you’ll be given codes and instructions to include one high in your page’s head> and the other after the opening body> tag. You can do this right now, or you can add the codes to your site later (they are accessible in your dashboard). When you’re finished, click “Ok.”

To Set Up a Tag
Once you’ve created a Google Tag Manager account, the first thing you’ll want to learn is how to create a tag.
Google Tag Manager allows you to create an unlimited number of tag configurations.
This is useful for creating detailed reports on your audience’s behaviour, but it can become inefficient if your tags are not properly organised.
Google suggests the following naming convention: tag type – app name – detail.
let’s check out how to set up a tag:
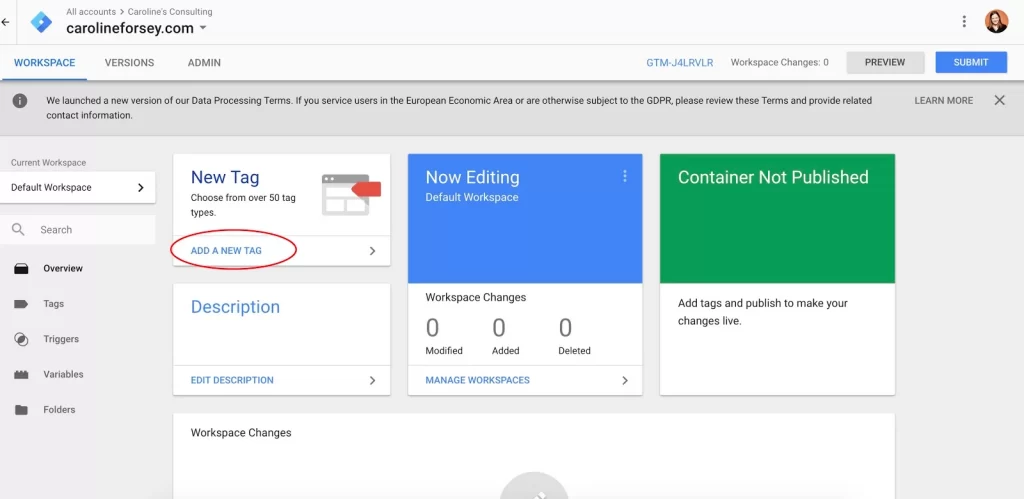
1. Create a new tag in the Google Tag Manager dashboard
Within your Google Tag Manager dashboard, click the “Add a New Tag” button, circled below in red.
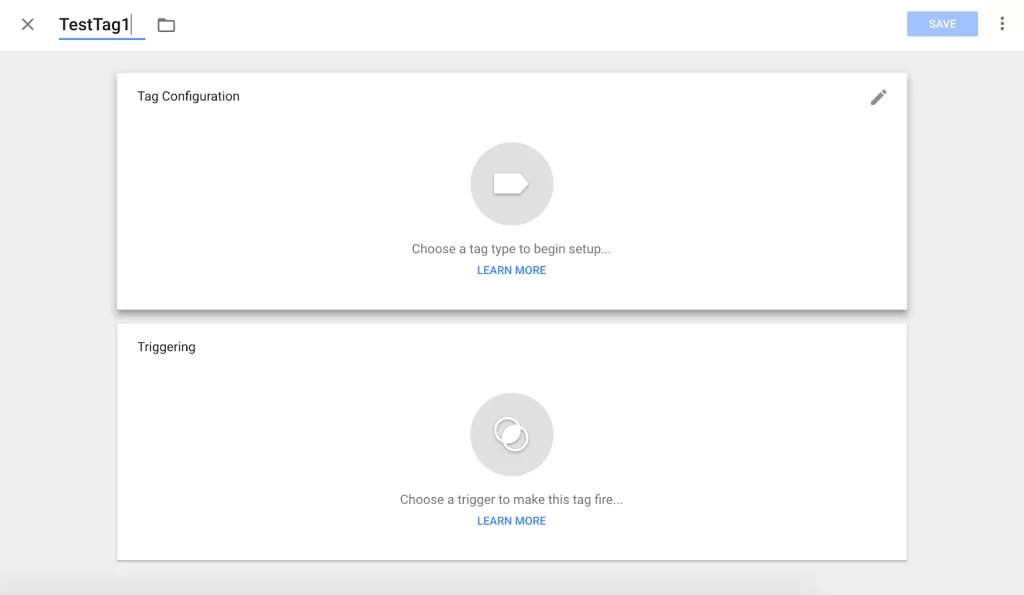
2. Configure your tag
Title your tag, and then click anywhere in the top “Tag Configuration” box, to choose a tag type.
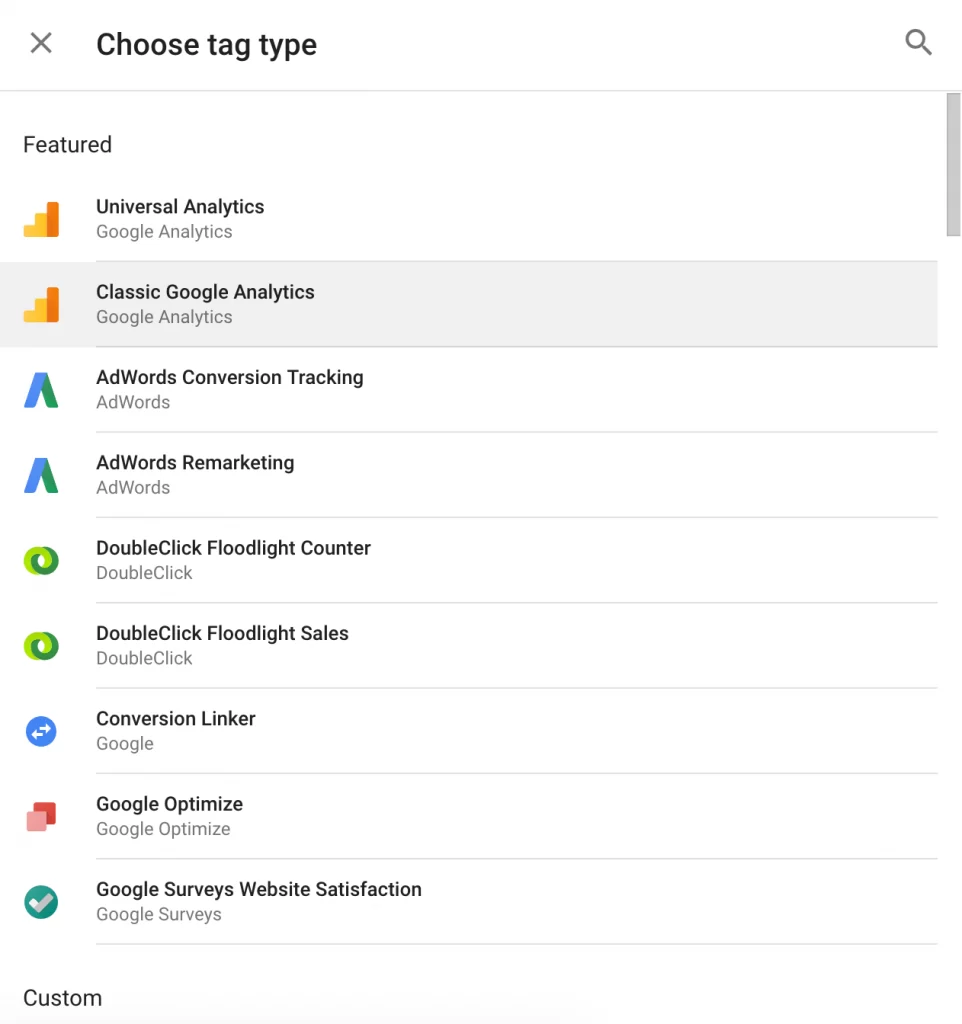
3. Choose a tag type
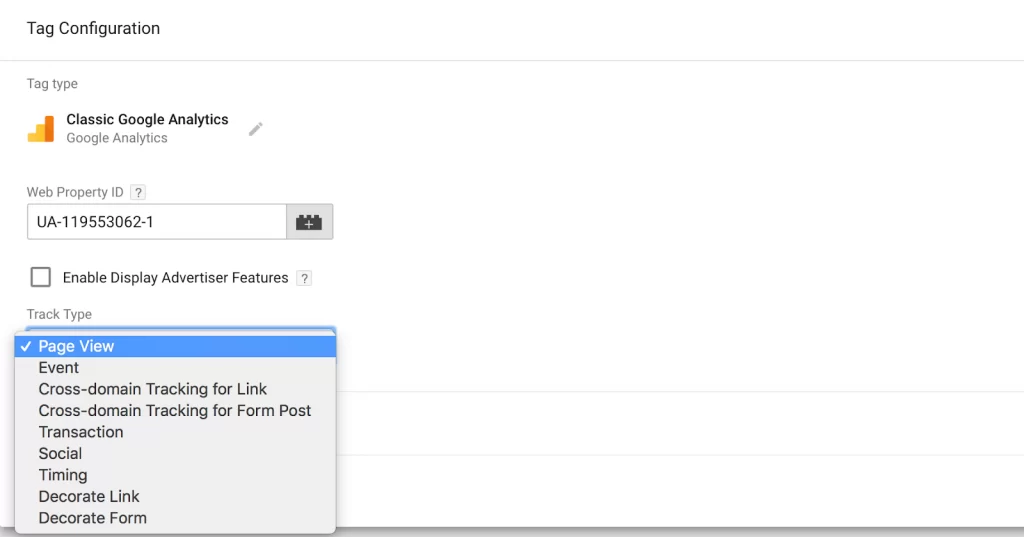
There are dozens of tag types (they are not all displayed here, and you can also customize a tag type). I chose “Classic Google Analytics”.
4. Link your tag to Google Analytics tracking
If you want your tag to be tracked in Google Analytics, enter your Web Property ID from your Google Analytics account. Then, choose a “Track Type.” I went with “Page View,” but there are numerous other options.
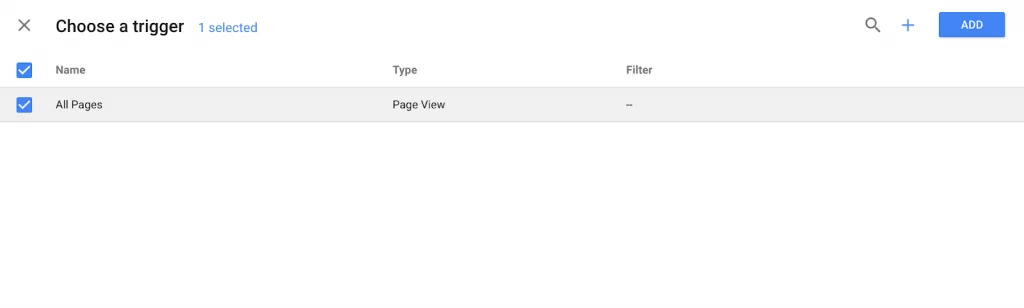
5. Select a trigger to control when the tag is recorded
Next, select a trigger (a trigger is when you want the tag to be recorded, for example, “every time someone visits the page”). I selected “All Pages” to receive insights whenever someone visits any of my web pages, but this varies depending on your needs.
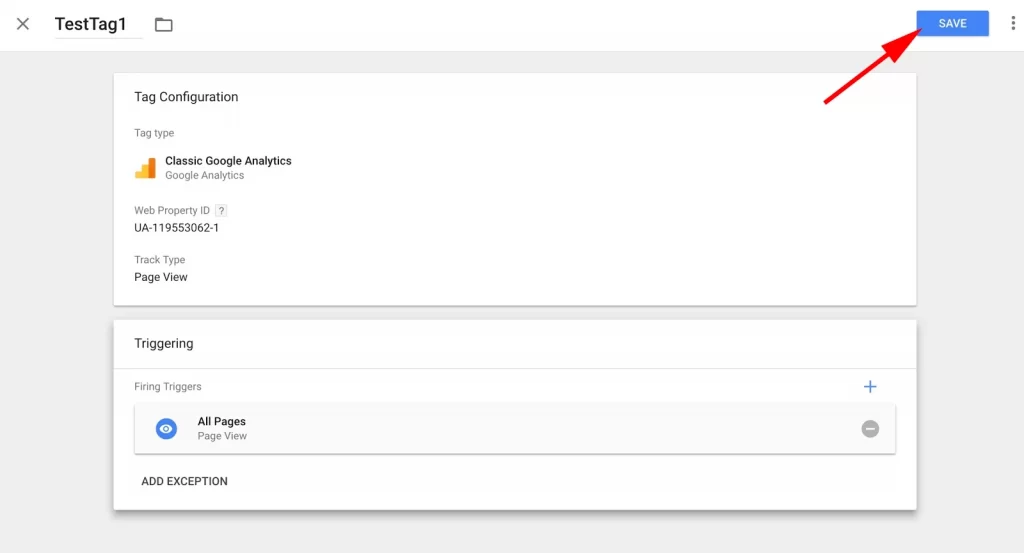
6. Save your tag
When you’re finished filling out the “Tag Configuration” and “Triggering” boxes, click the blue “Save” button.
7. Activate your tag by pressing “Submit.”
Next, click the blue “Submit” button. Your tag won’t work until you do so.

When you press the “Submit” button, you’ll be taken to this “Submission Configuration” page. You have two choices: “Publish and Create Version” or “Create Version.” Because I’m ready to add the tag to all of my site’s pages, I chose “Publish and Create Version” and then click the blue “Publish” button in the top right.
8. To keep your tags organised, give them a name and a description.
Finally, you’ll be shown this “Container Version Description”. To keep your tags organized, add a name and description to understand what you’re trying to record with this tag.
9. Ensure your tag appears in your “Version Summary” report.
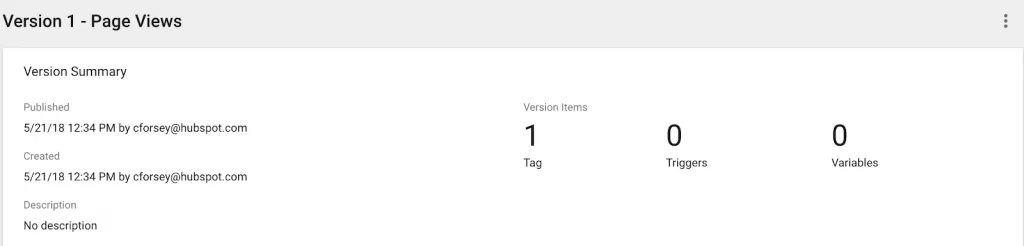
Now, you’ve successfully created your first tag.
So this was just a quick tutorial on how to set up Google Analytics event tracking in Google Tag Manager. The organisation is the most significant benefit of using Google Tag Manager. Once this is completed, you will be able to organise and manage your event tracking from the Tag Manager interface without having to make any changes to your website’s code.
We hope this article helped you to set up Google Tag Manager.
If you are interested in learning from videos, I recommend this Google Analytics video.
If you want to start a new website or a business website, you must first build a good website, so purchase a low-cost domain name and we will also provide the best website development.