
How to Manage Auto SSL Certificate in cPanel

AutoSSL Certificates in cPanel
After you’ve enabled AutoSSL in WHM, check to see if the certificates have been added to your account. The SSL/TLS interface in cPanel can be used to manage the certificates. The following article applies to both Shared Business Hosting and Reseller clients.
What is AutoSSL?
On our VPS and Dedicated server options, AutoSSL is a function available in WHM. It generates and installs free SSL certificates for specified websites hosted in the associated WHM.
You can use WHM to enable AutoSSL for your websites if you have a User-responsible or Basic hosting plan.
If you’re on a Complete hosting plan and don’t want to go through the effort of enabling AutoSSL on your own, you may file a ticket to the “Hosting – VPS and Dedicated Servers” department here, and our experts will help you out.
AutoSSL Overview
During the construction of WHM, the AutoSSL functionality can be added to the “Feature list.” The Feature list is a list of features that will be added to the cPanel of the user. If AutoSSL was not initially included, it is possible to add it later by editing a “Feature list.” A guide on managing features in WHM may be found here.
The “Administer AutoSSL” page in WHM’s SSL/TLS section can be used to manage the AutoSSL feature once it has been added.
On the “Manage AutoSSL” page, there are various tabs.
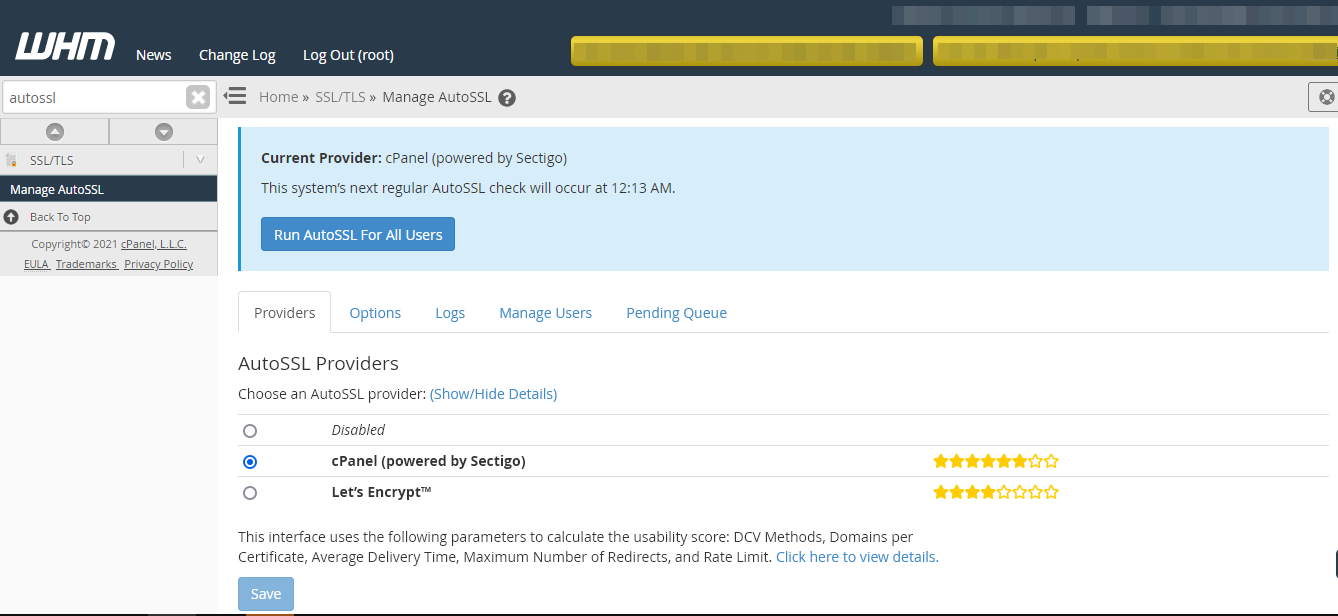
- Providers – displays SSL certificate providers as well as their star ratings. By choosing the “Show/Hide Details” button, you can learn more about each SSL provider. Choose your favourite SSL provider and click “Save” to utilize an SSL certificate issued by that service.
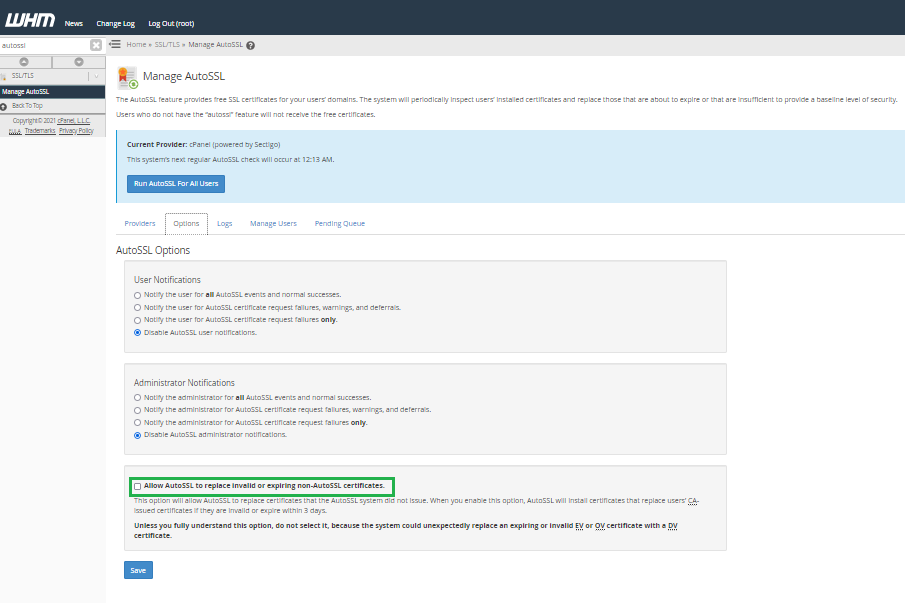
- Options – AutoSSL notifications management. Here you can enable or disable AutoSSL notifications for users or administrators regarding the warnings, successful or failed AutoSSL installation.
Note, if you enable the “Allow AutoSSL to replace invalid or expiring non-AutoSSL certificates” option, the AutoSSL certificate will replace any expired, due to expire, or invalid non-AutoSSL certificate already set up for the selected domain or subdomain. If you would like to have some domains with AutoSSL certificate and some domains without it, please make sure this option is disabled.
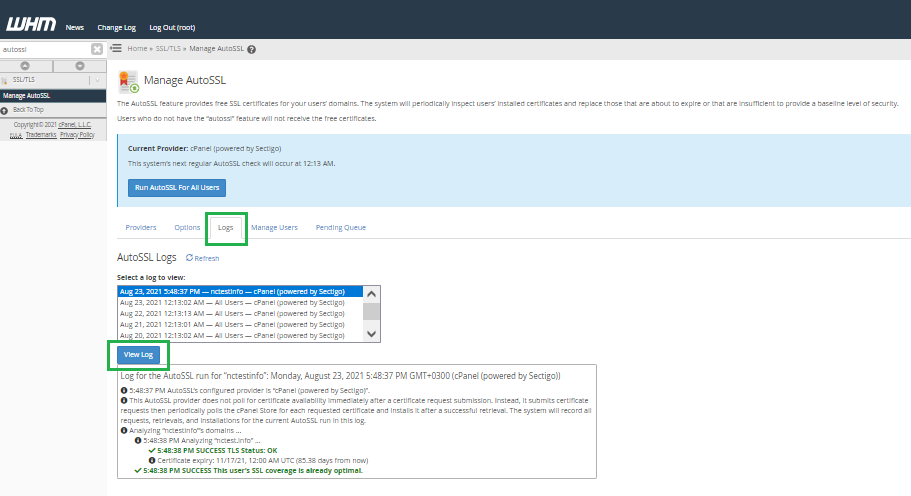
- Logs – here you can review the system’s AutoSSL log files. You can get more information about a specific log by selecting it from the list and clicking the “View Log” button.
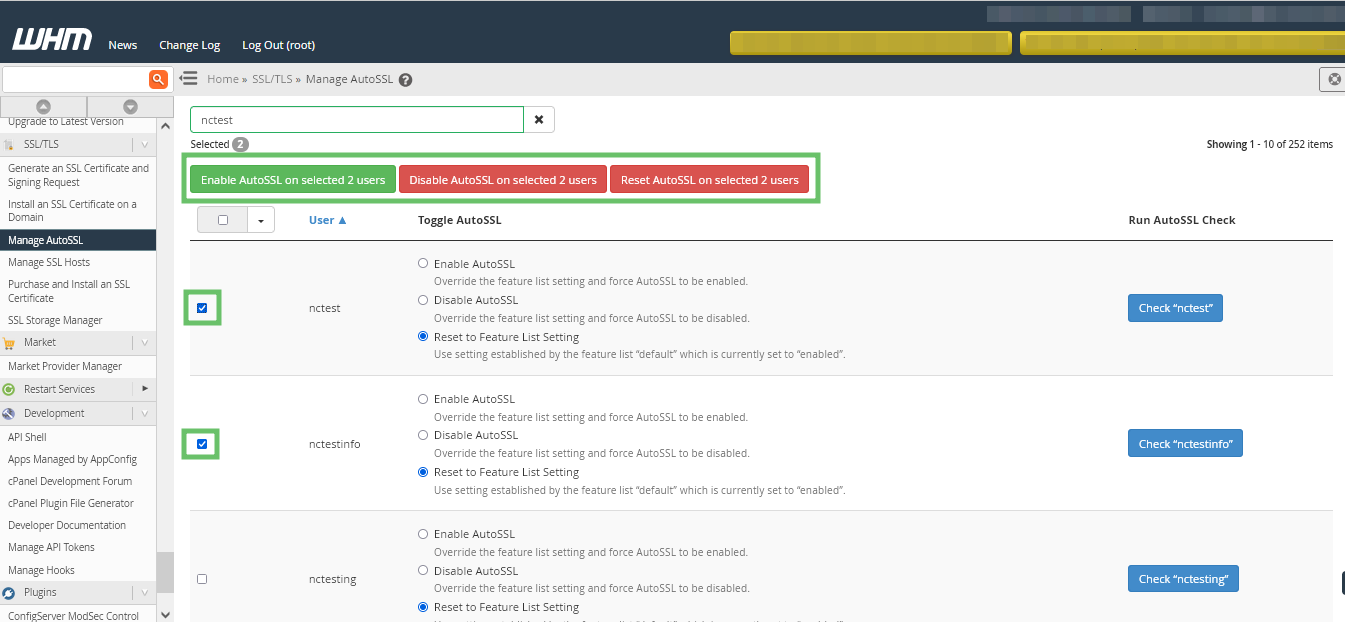
- Manage Users – here you can manage the AutoSSL settings for every cPanel account: enabling, disabling, or resetting an AutoSSL certificate. To check a domain for a specific user, you can click the “Check” button.
- Pending Queue – shows a list of the SSL certificates that have been activated but not installed.
How to enable AutoSSL in WHM
Follow the instructions below to enable the AutoSSL functionality for certain websites:
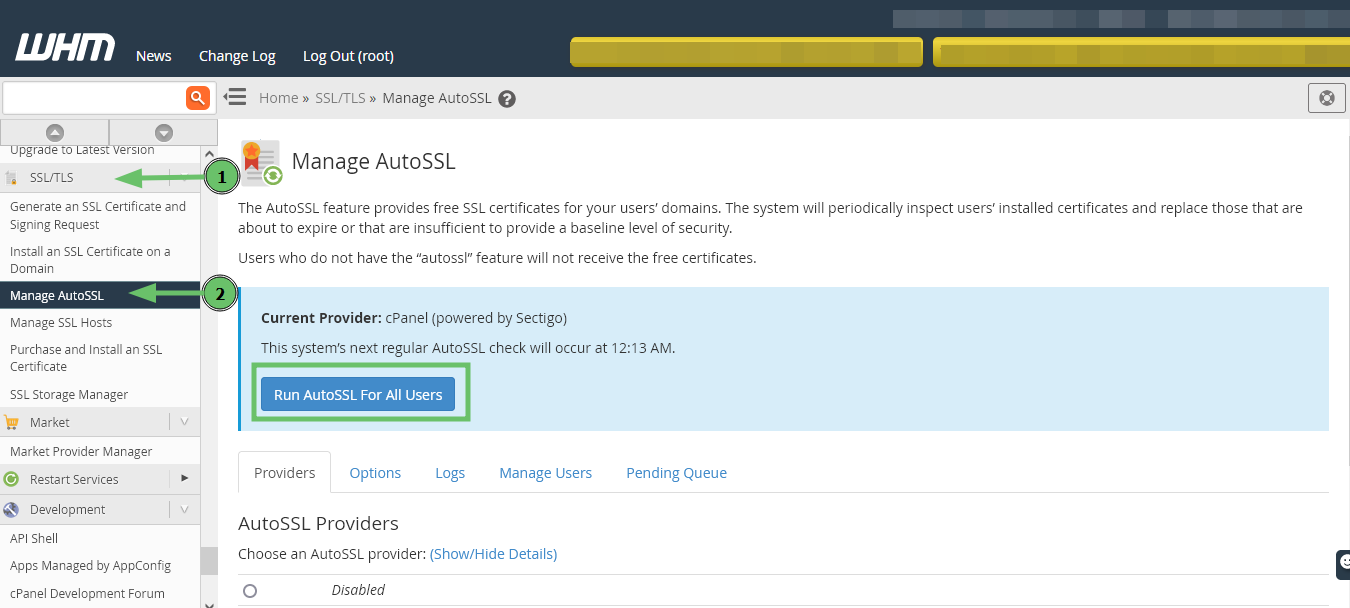
- Open the “SSL/TLS” section of the WHM panel and select “Manage AutoSSL.”
- To activate SSL certificates for all domains and subdomains in this WHM panel and accompanying cPanel accounts, click the “Run AutoSSL For All Users” button.
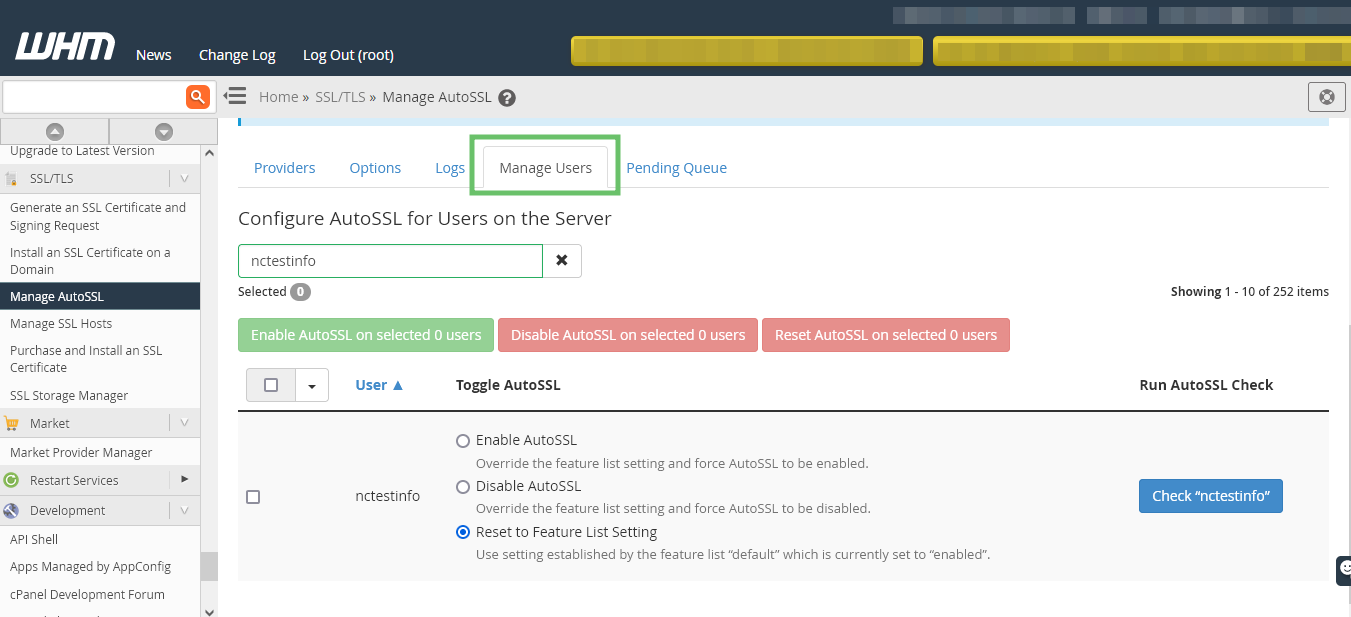
You may also turn on AutoSSL for a group of users. To choose certain users, simply tick their names in the list. Then, above the user list, use the buttons to activate, disable, or reset to default settings.
If there are problems with the AutoSSL configuration, go to the “Logs” tab and choose the individual log, then click “view log.”
How to manage AutoSSL certificate in cPanel
The SSL certificate will be deployed in cPanel automatically if the WHM option “Allow AutoSSL to replace invalid or expiring non-AutoSSL certificates” is activated.
If this option is deactivated, you must manually install the additional SSL certificate by following the instructions below:
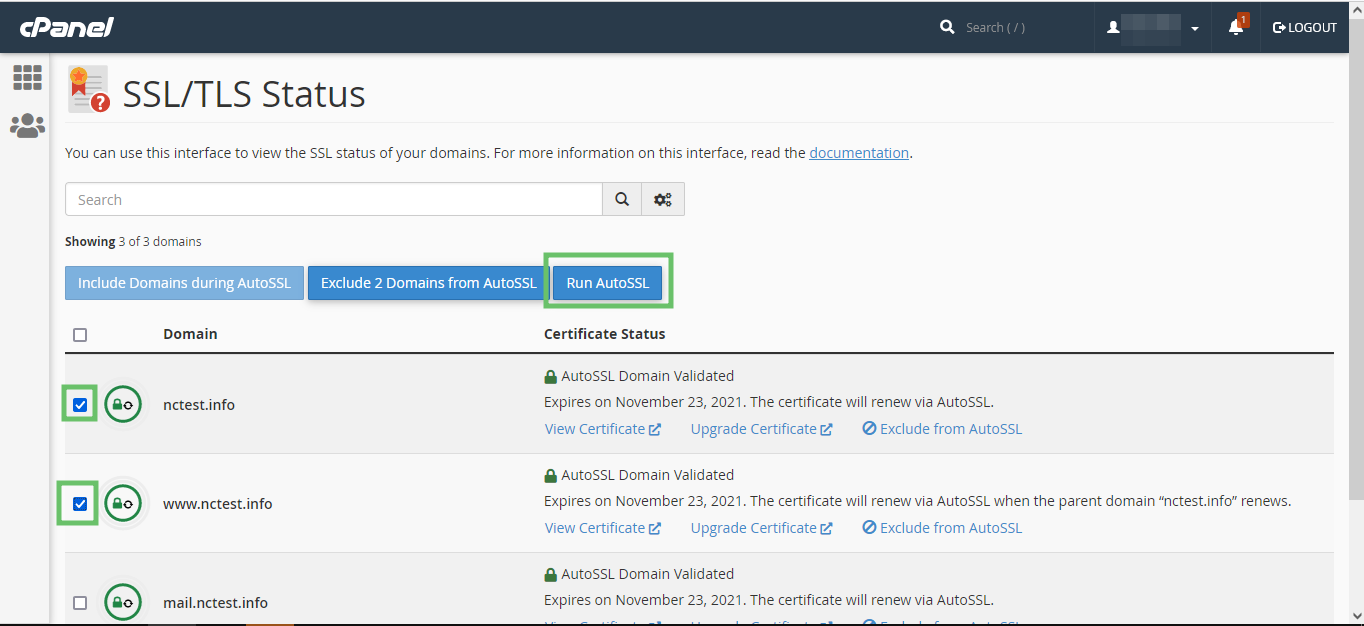
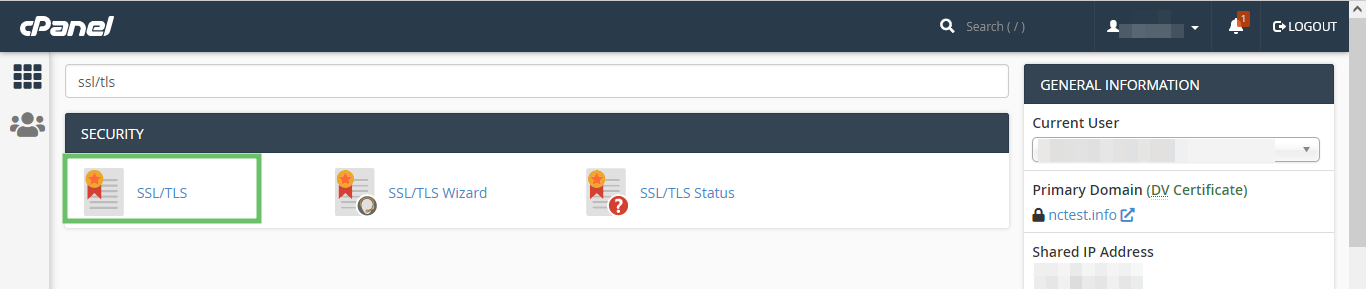
- In cPanel, go to the “SSL/TLS Status” area.

There you will see a list of all the domains and subdomains in cPanel along with their SSL certificates.
- If an SSL certificate was not installed for any of the required domains, you can select the domains in the list and click “Run AutoSSL” to force AutoSSL installation for them.
OR
- Another option to enable a certificate is to install it manually via the “SSL/TLS” section:
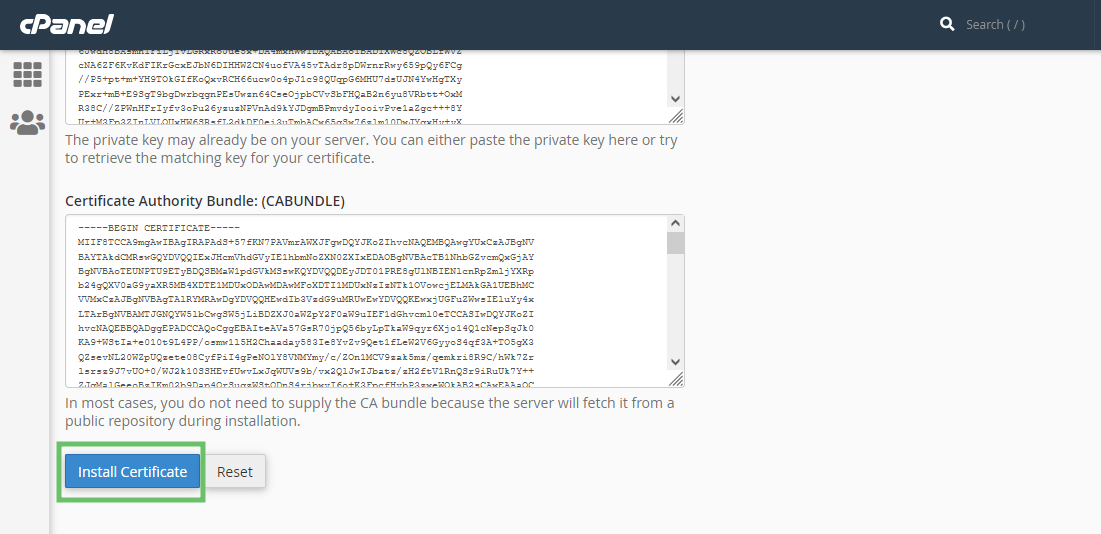
- Go to the “SSL/TLS” section in the cPanel account and choose “Certificates (CRT)“. There you will see a list of the SSL certificates that were added to cPanel.

2. Choose the required certificate and click “Install“. After this, you will be taken to the certificate installation page.

3. Scroll down and click “Install certificate” to proceed with its installation.
To check the installed SSL certificates in cPanel:
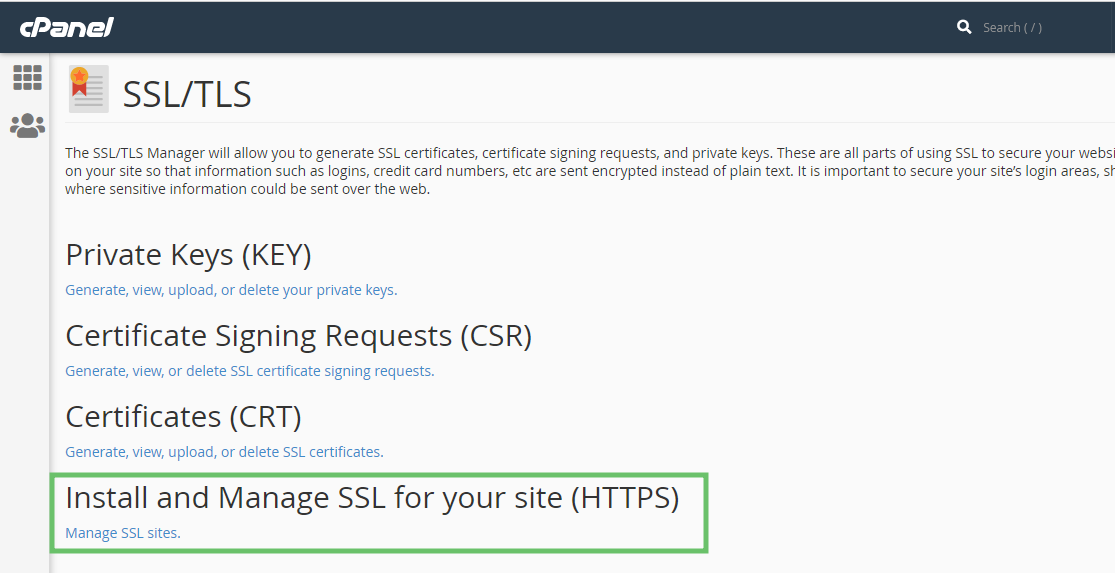
- Go to the “SSL/TLS” section in cPanel;
- Click “Install and Manage SSL for your site (HTTPS)”;
- Wait a few seconds to see the list of the domains and subdomains added to cPanel;
- If a green lock symbol appears next to the domain or subdomain, this means the SSL certificate has been installed correctly. You can check more information regarding the SSL by clicking on “Certificate Details“. The certificate issuer, domains and subdomains included in this certificate will be listed there.
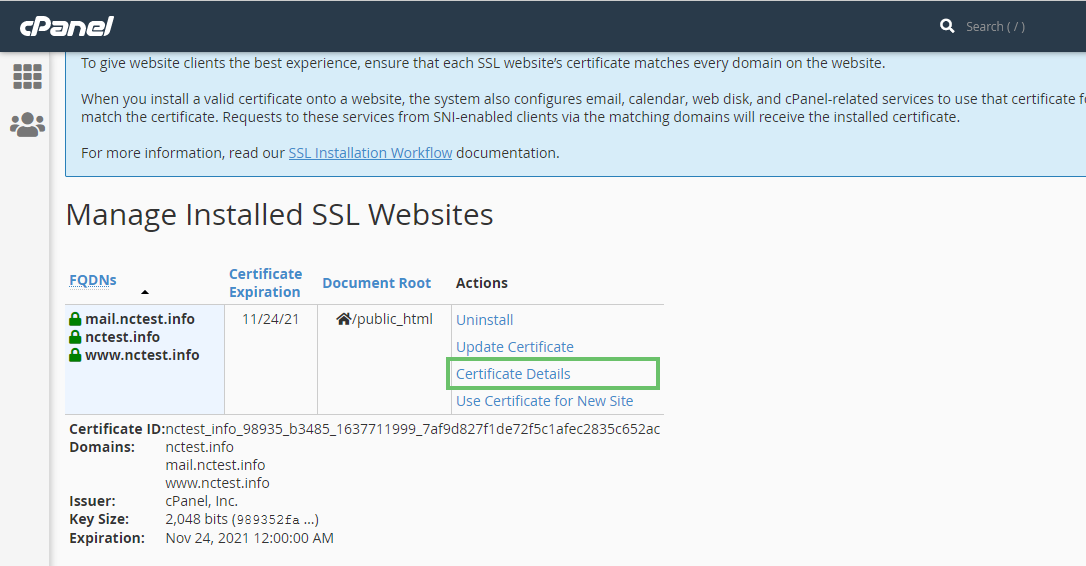
Use the “Uninstall” option to remove the certificate. This will disable the certificate, but it will still be stored in cPanel.
If you ever need to enable the SSL again, you can install it via the “Certificates (CRT)” part in the “SSL/TLS” section by clicking the “Install” button beside the required certificate.
More Information
For more information about Google G Suite/Workspace domains, Server, Hosting, check out these F60 Host resources: