How to install SSL Certificate
What is an SSL certificate?
An SSL certificate is a digital certification that verifies the identity of a website and allows for a secure connection. Secure Sockets Layer (SSL) is a security protocol that establishes an encrypted connection between a web server and a web browser.
SSL certificates must be installed on a company’s or organization’s website in order to safeguard online transactions and keep customer information private and secure.
In a nutshell, SSL protects internet connections by preventing thieves from reading or altering data sent between two systems. SSL safeguards the website you’re visiting if you see a padlock icon next to the URL in the address bar.
Steps to Install SSL Certificates with cPanel
Step 1 : Log in to your cPanel account and navigate to the Security section >> SSL/TLS Manager menu.
Step 2 : Select Manage SSL sites from the Install and Manage SSL for your site (HTTPS) menu.

Note: if this option is not available, it might mean that you don’t have the necessary admin rights for SSL installation. Contact your web host provider for assistance.
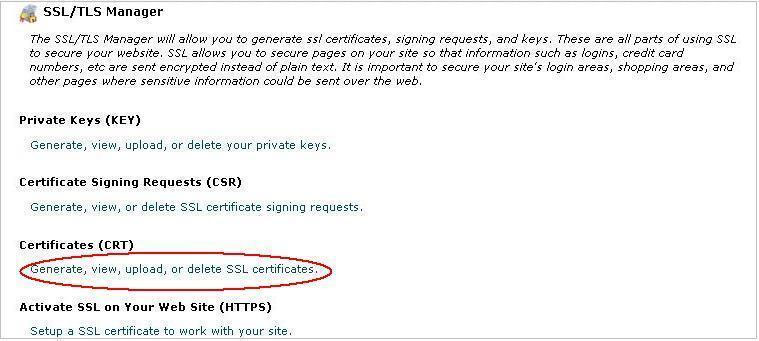
Step 3 : Click on Generate, view, upload or delete SSL Certificates in the ‘Certificates’ section.
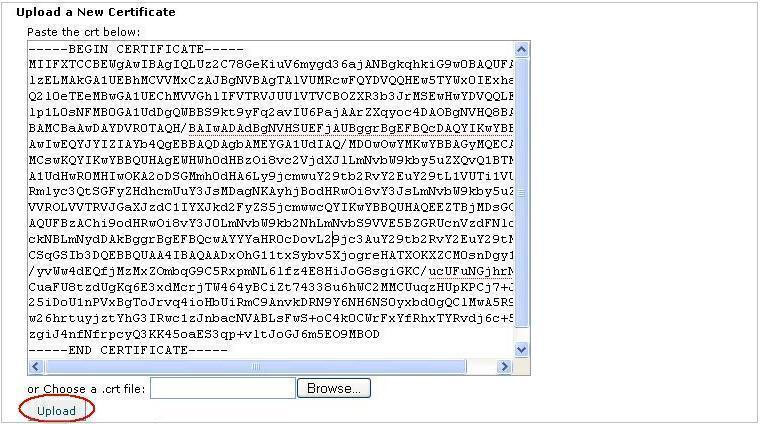
Step 4 : Import Domain/End Entity Certificate.
Part 1 . Copy and Paste the contents of ‘yourDomainName.crt’ into the text box labeled ‘Paste the crt below’ in the ‘Upload a New Certificate’ section.
– or –
Part 2 . Click ‘Browse’ and navigate to ‘yourDomainName.crt’ and then click ‘Upload’.
Step 5 : Click Go Back.
Step 6 : Scroll down to the bottom of the page and click on Return to SSL Manager.

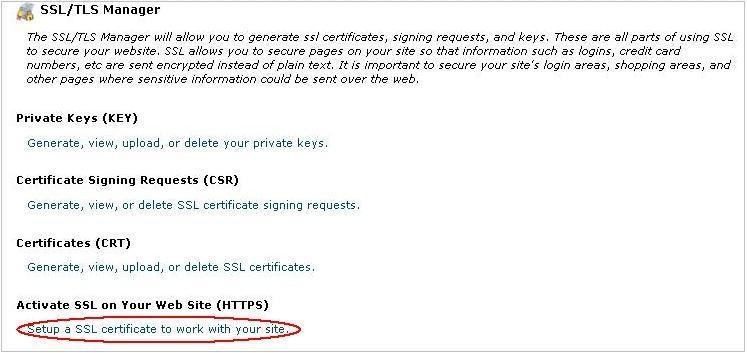
Step 7 : Click on Setup a SSL Certificate to work with your site.
Step 8 : Select the domain you are using from the Domain drop-down menu. The system will attempt to fetch the SSL Certificate and Private Key for you.
Note: You do have the option to copy and paste these files into their appropriate boxes at this time.
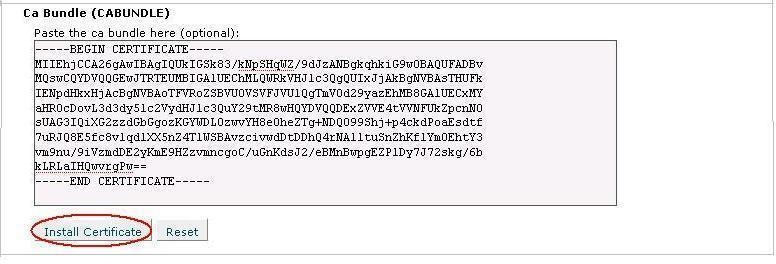
Step 9 : In the box labled CA Bundle, paste the contents of the CA Bundle file that was provided.
Step 10 : Click on Install Certificate.
It’s finished! Your site and domain name are now secured.
