
How to Create Email Accounts in cPanel?

What Is cPanel?
cPanel is essentially a Linux-based control panel with cPanel installed. The hosting package includes a cPanel account for managing your web hosting components and creating email accounts in cPanel and many more.
Keeping this in mind, cPanel may be utilized in a variety of hosting environments, including shared, dedicated, and managed WordPress hosting.
This control panel is a wonderful choice for beginners who want a simple control panel solution. However, just like other hosting control panels, cPanel has its benefits and drawbacks.
To create the email account in cPanel, Use the Email Account feature to create, delete, and manage email accounts from the cPanel dashboard. Clicking on the icon will open a list of active email addresses on your website.
Steps to create Email Accounts in cPanel
You don’t have an email account set up by default. Although the main username appears to be set up as an email account, if you want to use it, you must add it as an email account.
The video and instructions below will walk you through setting up an email account in cPanel and accessing it.
To create an email account:
Step 1: Log in to cPanel.
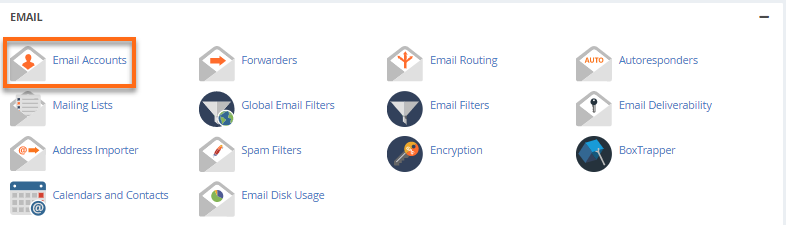
Step 2: Look for the Email section, then click Email Accounts.
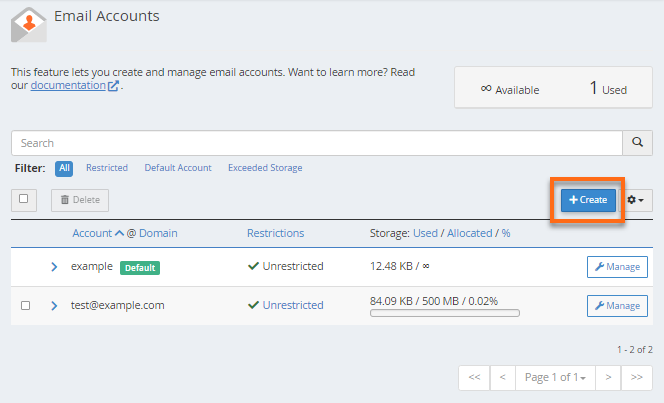
Step 3: Click the + Create button located on the right-hand side.
Step 4: On the next page, enter the required details to create a new email account.
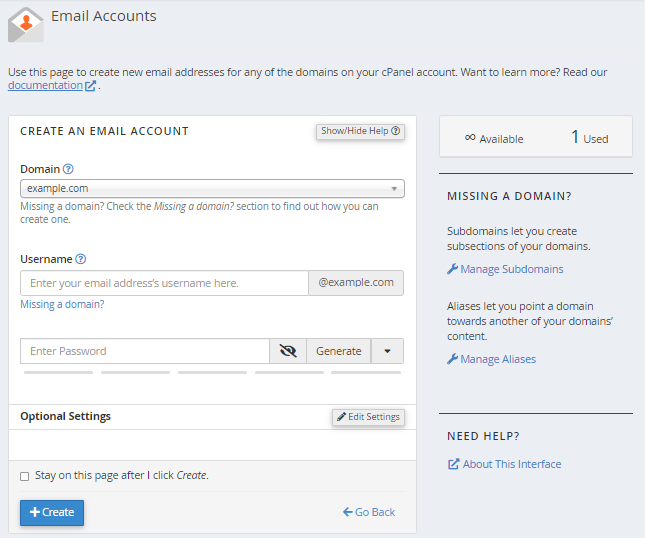
- Domain: Select the domain where you wish to create the new email account.
- Username: Enter your email’s username.
- Password: Enter your email’s password.
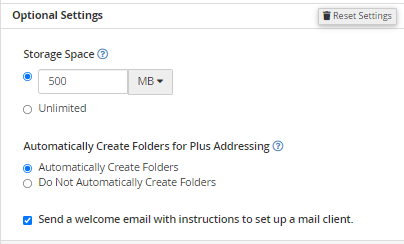
Step 5: You will notice the Optional Settings. Click the Edit Settings button to customize the new email account. This is where you can set your email’s storage space.
Step 6: Click + Create to finalize.
The same steps work for creating email accounts for your primary domain, addon domains, and subdomains. You cannot create email accounts with a script or via SSH.
How To Create Forwarders
Email Forwarder
This email feature allows you to set up an email account so that incoming emails are forwarded to a different address.
To make an email forwarder, follow these steps:
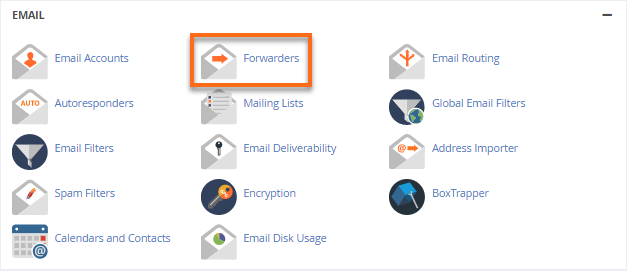
Step 1: Navigate to the Email section, then click Forwarders
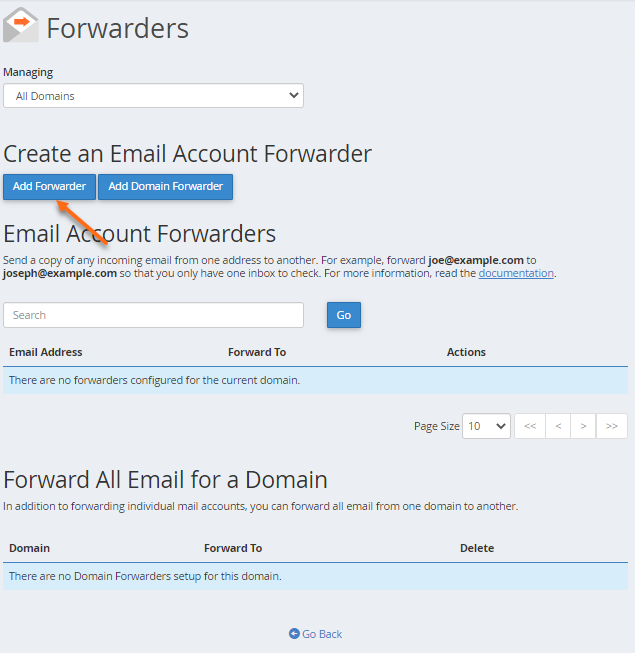
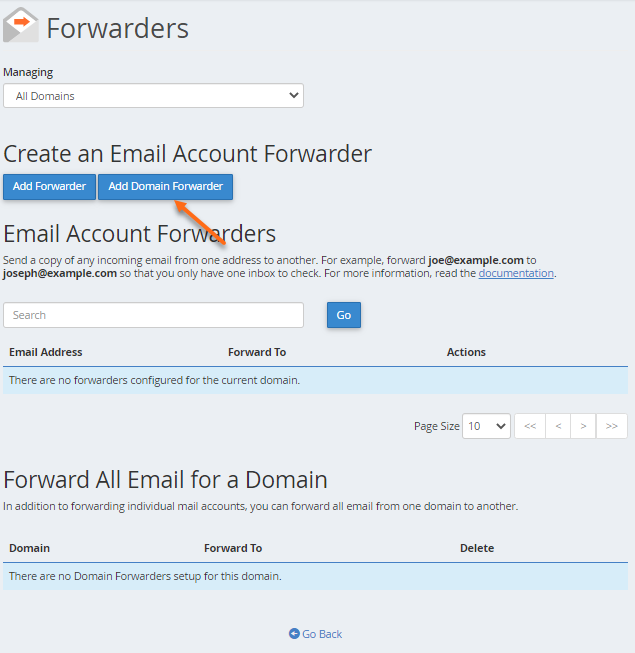
Step 2: On the Forwarders page, click the Add Forwarder button
Step 3: On the next page, fill out the Address to Forward text box. This is the username to which you want to forward the incoming email.
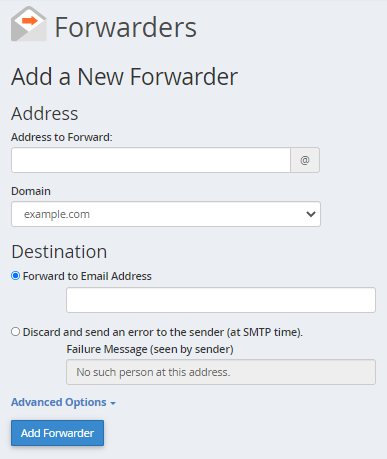
Step 4: Select the domain of your email account.
Step 5: Select any of the following Destination options.
- Forward to email address: This option forwards incoming emails to another address. Provide the forwarding address in the text box.
- Discard and send an error to the sender (at SMTP time): This option discards incoming email and automatically sends a failure message to the sender. You may enter your preferred failure message in the Failure Message text box.
Step 6: You can click the Advanced Options to configure additional options
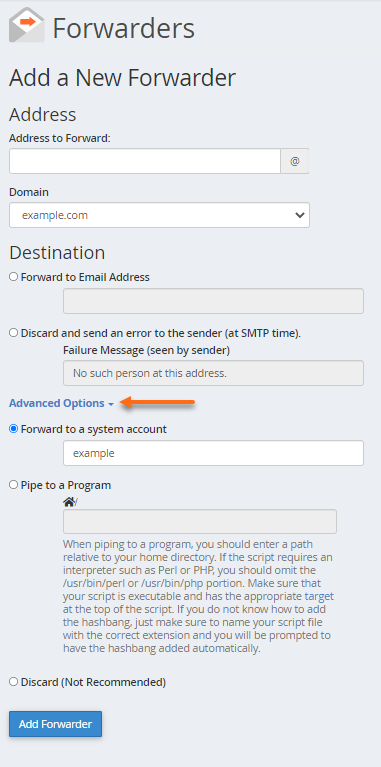
- Forward to a system account: This option forwards an incoming email to a system user. Please note that system accounts do not have a public-facing email address.
- Pipe to a Program: This option automatically forwarding an incoming email to a program through a path provided in the text box.
- Discard (Not Recommended): This option discards incoming emails without sending a failure message to the sender.
Step 7: Once done, click the Add Forwarder button.
Domain Forwarder
This email function sends emails sent to invalid addresses to a different domain.
To create a domain forwarder:
- On the Forwarder’s page, click the Add Domain Forwarder button.
2. Enter the domain to which you want to forward your emails.
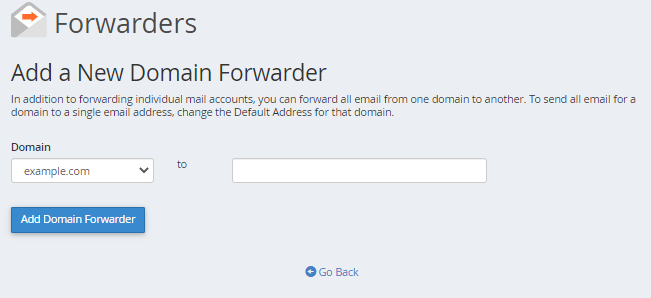
3. Once done, click Add Domain Forwarder button.
This are all steps to Create Email Accounts in cPanel, Email Forwarder, Domain Forwarder for more details visit F60 Host.
More Information
For more information about Google G Suite/Workspace domains, Server, Hosting, check out these F60 Host resources: