
How to set up SPF, DKIM, and MX-Records for Google G Suite

Successfully Set Up SPF, DKIM , and MX-Records for G Suite
Are you surprised and frustrated that some of your important business emails have been refused or blocked? On this path, you’re not alone. Spammers’ forgeries are typically the cause of this.
These hackers have progressed to the point where they may now impersonate you by sending unauthorized emails on your behalf. SPF, DKIM, and Mx-records, on the other hand, help to avoid email spoofing when used in email marketing.
Let’s look at how to set up SPF, DKIM, and MX-records in G Suite to avoid email spoofing by these hackers in this article.
How to set up SPF
The DNS entries that guide web traffic to your domain are stored in the domain. Also, an SPF TXT record specifies which servers are allowed to send emails from your domain, and if an email is sent from a server not on this list, it is filtered as spam. The SPF for G Suite may be configured in the following way.
- First, sign in to your domain account.
- Navigate to the page for updating the domain’s DNS records. The name can be named server management, DNS management, or it may be advanced settings.
- Look for TXT records and see if the domain has an existing SPF record. The SPF always begins with “v=spf1”.
- If the domain already has an SPF record, remove it and, if otherwise, move to the next step.
- Set up a TXT record with these values
- Host/Alias — Enter @ or you may leave it blank
- Time to Live (TTL) — Enter 3600 or leave the default
- Value/Answer/Destination — Enter v=spf1 include:_spf.google.com ~all
- Save the record
- Within 48 hours, the new SPF record becomes active
How to set up DKIM
DKIM may be compared to a signature that can be appended to an email to prevent it from being faked. Generating a private domain key that may be used to encrypt outgoing emails, as well as adding a public key to the domain’s DNS, should be done. Here’s how to set up DKIM for G Suite in a few easy steps.
- First off, sign in as a super administrator
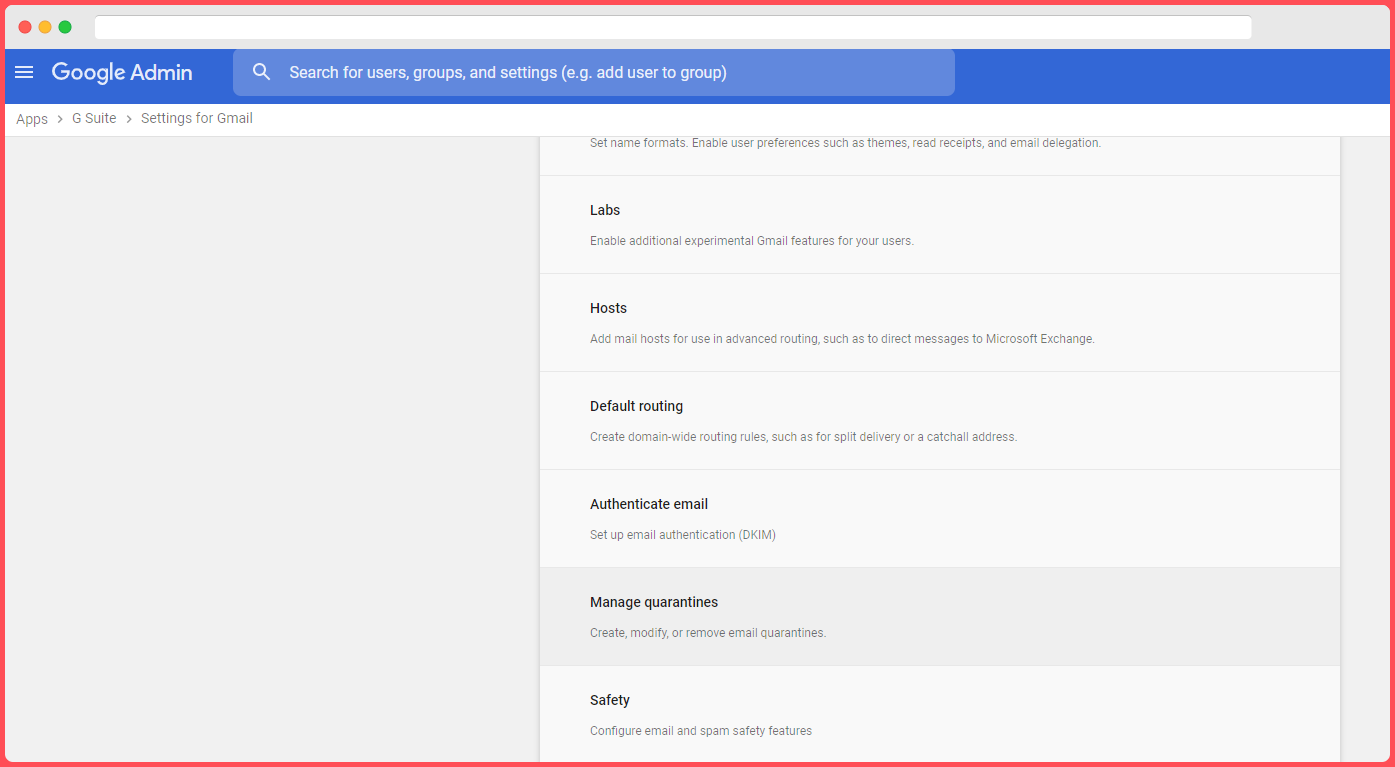
- Navigate to the Apps, then to G Suite, then to Gmail.
- Go to authenticate email from Gmail
- Choose the domain from which DKIM will be used.
- Generate a domain key for the domain
- Click on select another domain to generate a domain key
- Then click generate a new record
- Finally, log into your Cpanel or DNS control and add this record into it as a TXT record with ‘google._domainkey’ as the host and the DKIM key Google provided as the value

How to set up MX
Here’s how to set up MX for G Suite in a few easy steps. First, obtain the values from the Google help section. Ready? Let’s get started:
- Log in to your domain host’s account
- Navigate to the (Advanced) DNS Management or Mail Setting or Advanced Setting section
- If there’s an existing MX record, delete it
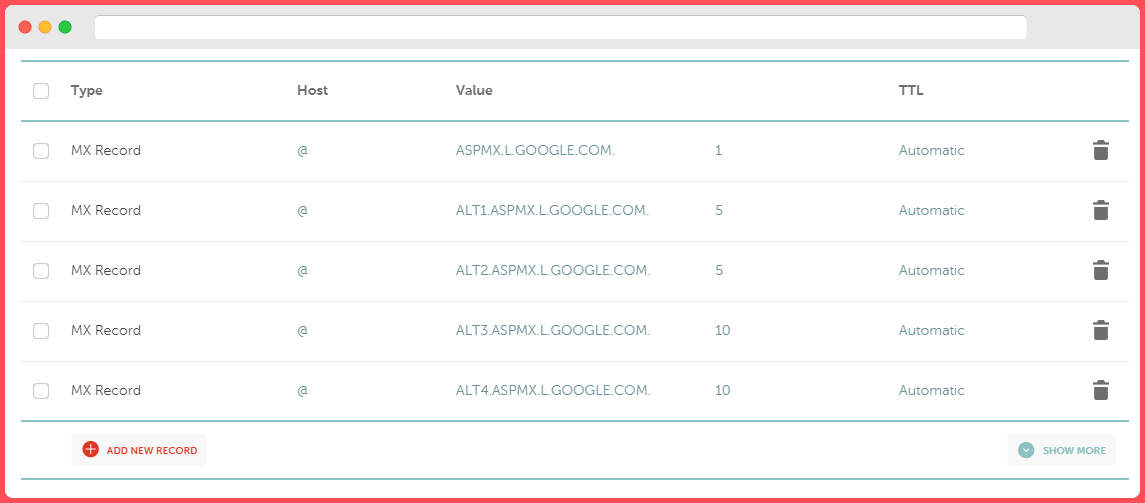
- Add the new MX records for the Google mail servers
- Save the changes you made
- Make sure your domain provider doesn’t require any additional steps to activate GMail instead or their native email client
- Within some six hours, you’ll be able to send and receive messages at your new G Suite, but it may take up to 72 hours before you receive an email at your new address.
If you wish to double-check that everything is set up correctly, go to Mail-Tester or MailGenius and run a test there. If anything doesn’t check out, they’ll give you advice, but keep in mind that some of these modifications might take up to 72 hours to appear.
What’s next?
Are you unsure what to do next? We provide cold email as a service at Leadaro. We can take care of any technical set-up for you, as well as ensuring that your freshly configured inbox is brimming with new leads.